Client User Settings
Introduction
The User Settings section provides clients with the tools to personalize and manage their platform experience. These settings allow you to customize your profile, adjust display preferences and configure various features to optimize your workflow.
Navigate to User Settings
Click on User Profile > Personal Settings
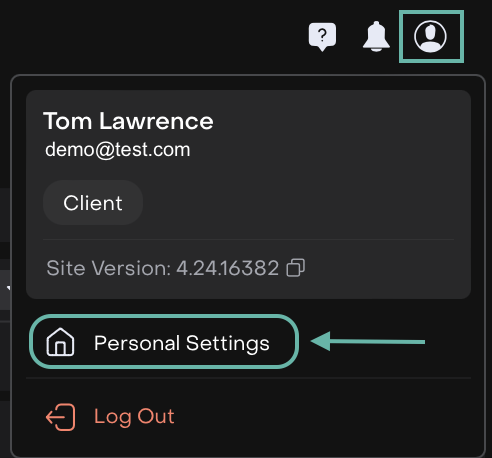
Click to view or change the Profile settings (Personalization, Password, Preferences, Requests, Notifications, Price Alerts, etc).
Additional User Settings
As a client, you can modify a variety of settings, including:
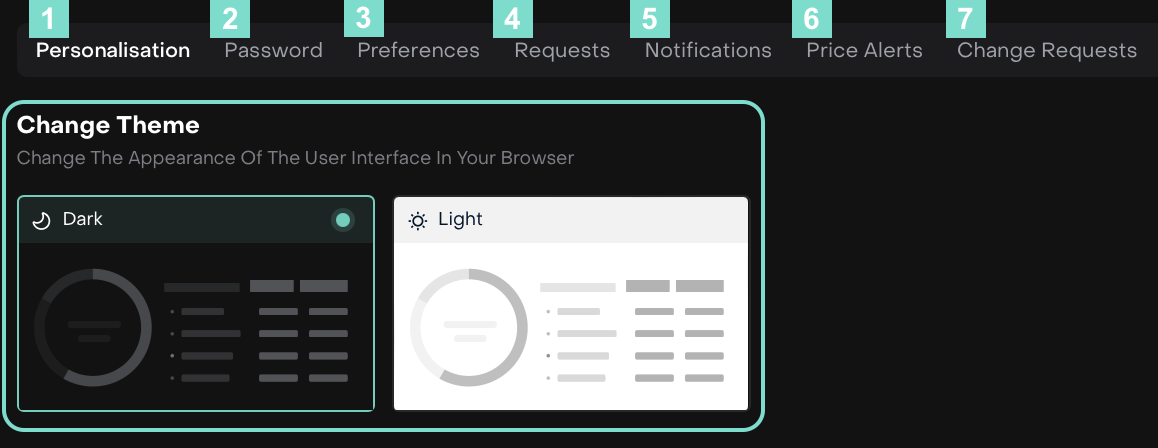
1. Personalisation
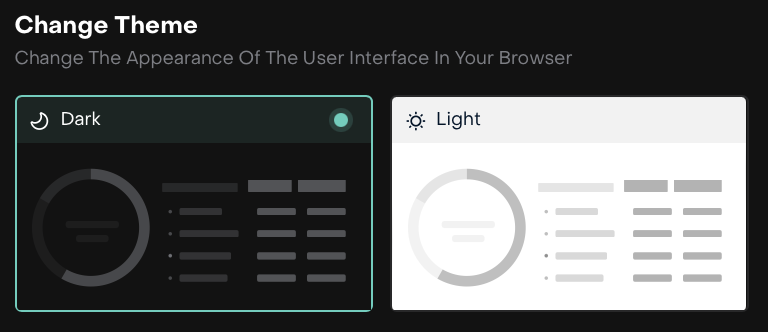
On User Settings > Find Personalisation tab > Change Theme
Choose from Dark or Light themes.
Click on your preferable theme and the platform will set it up, automatically.
2. Password
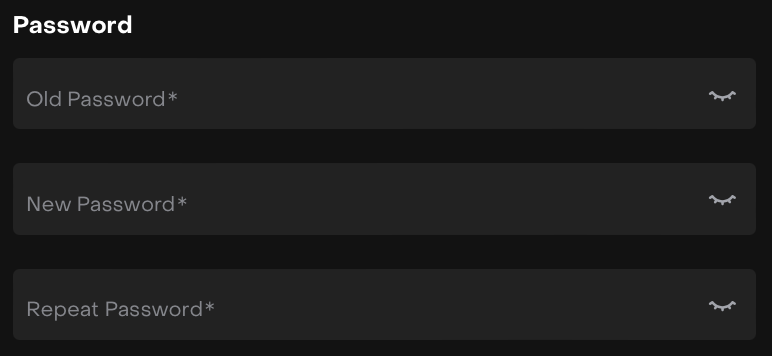
On the User Settings > find the Password tab.
Enter Your Old Password.
Type in your current password to verify your account.
Create a New Password and Repeat Password (make sure it matches).
Conditions:
At least 12 characters long
At least 1 number character
1 capital and 1 lowercase letter
1 special character (@S!%*#? &^→)
Then, click and confirm on your New Password.
3. Preferences
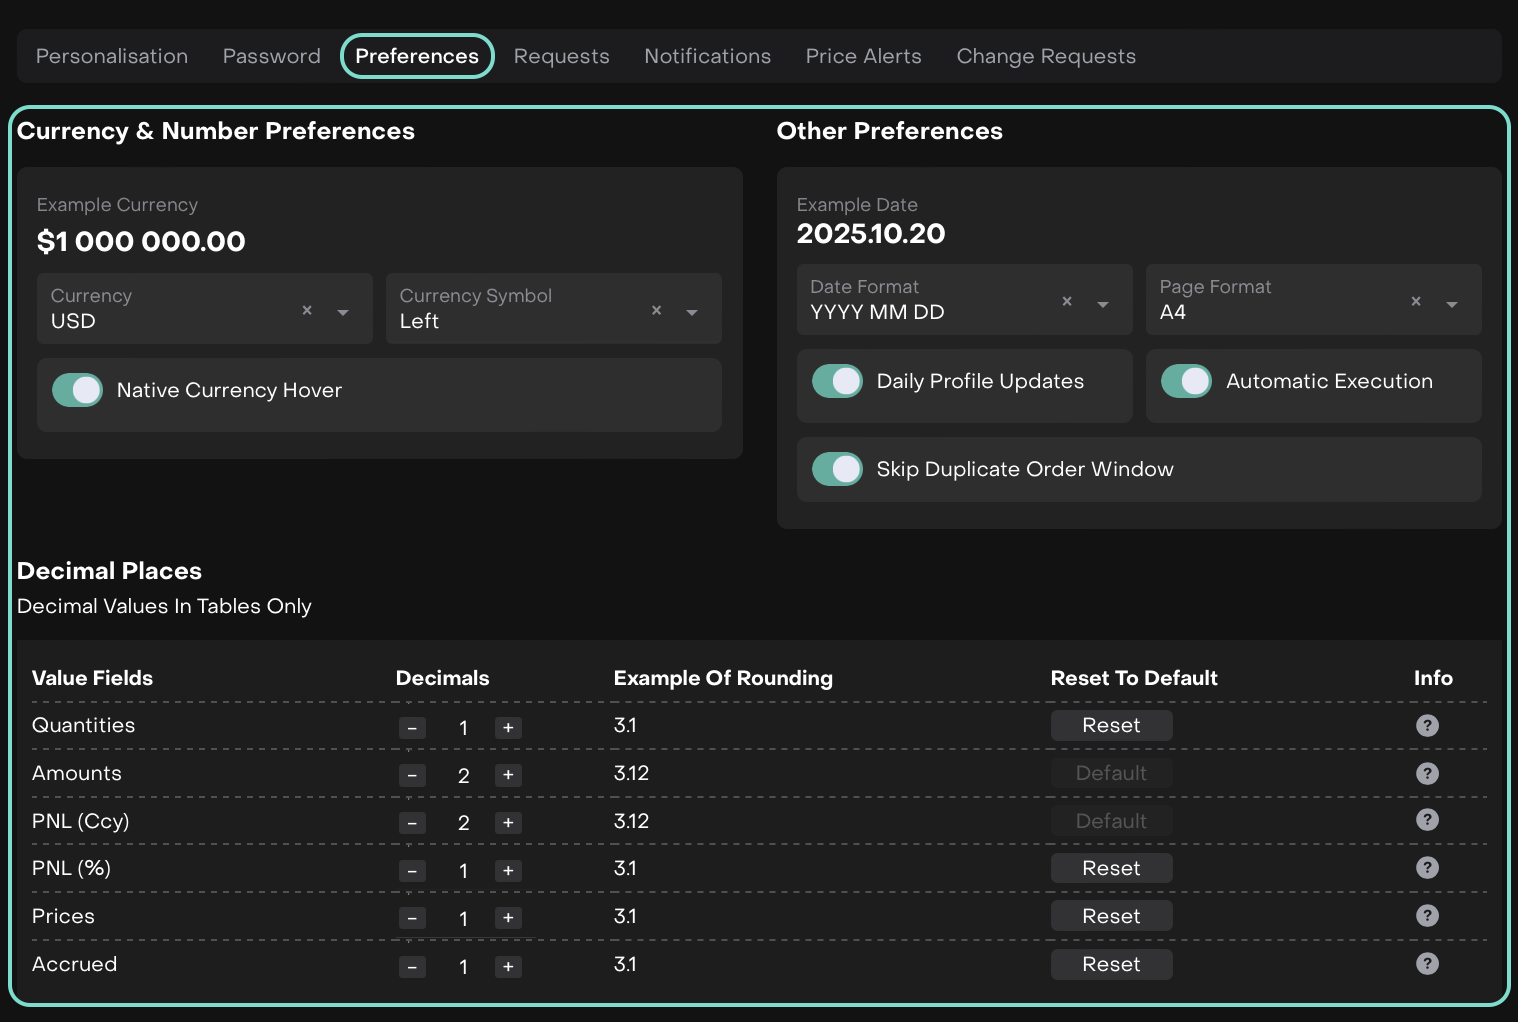
Go to Personal Settings > Click Edit icon to Edit and select Preferences tab where you can adjust your decimal display preferences.
You can tailor how specific values like quantities, amounts and prices appear across the platform and in reports. Whether you need 2 decimals or 5, it’s up to you.
Set up the Decimals by clicking on “-” or “+” buttons.
Use Reset To Default to go back to 2 decimal places.
Click on Info icon to check which are the fields on the tables that are changed.
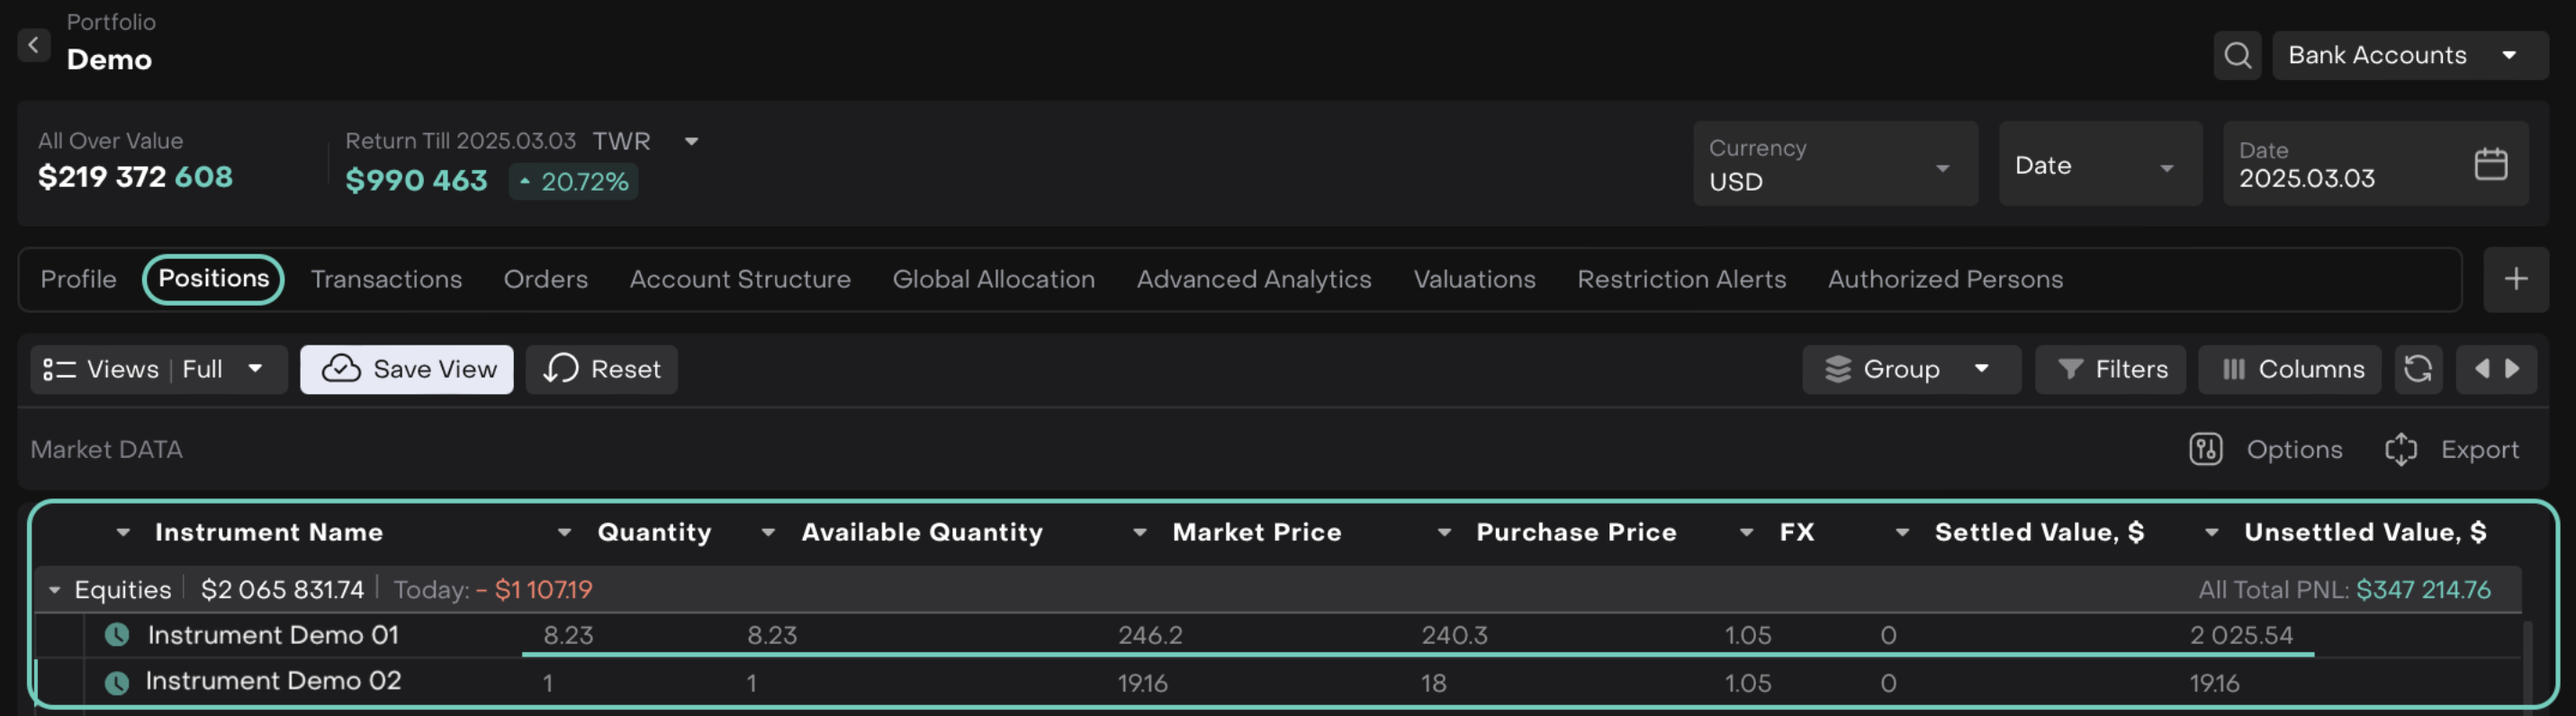
Once you set your preferences, they will be automatically applied to the platform views (tables, forms) and also to any exported files.
Platform Validation:
The platform will check for valid inputs and ensure that nothing exceeds the maximum decimal limits, so you never have to worry about incorrect formatting or data errors.
4. Requests
From Personal Settings menu, select the Requests tab.
Here, you can view your Current Requests.
The Requests tab will show a table with columns like Ticket ID, Summary, Submit Date, Estimated Delivery Date, Priority, and Status.
You can sort or filter requests by any of these fields for easy access.
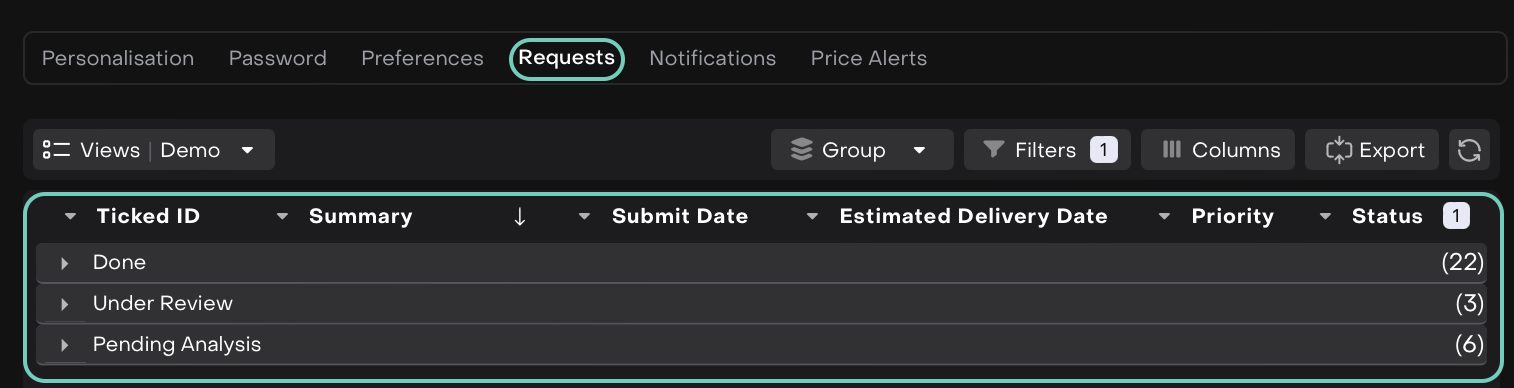
If you need to export your requests for further analysis or reporting, use the Exportbutton to download the data.
5. Notifications
Go to Personal Settings > Find Notifications tab.
Turn on/off switcher to activate/deactivate Email or Push notifications.

6. Price Alerts
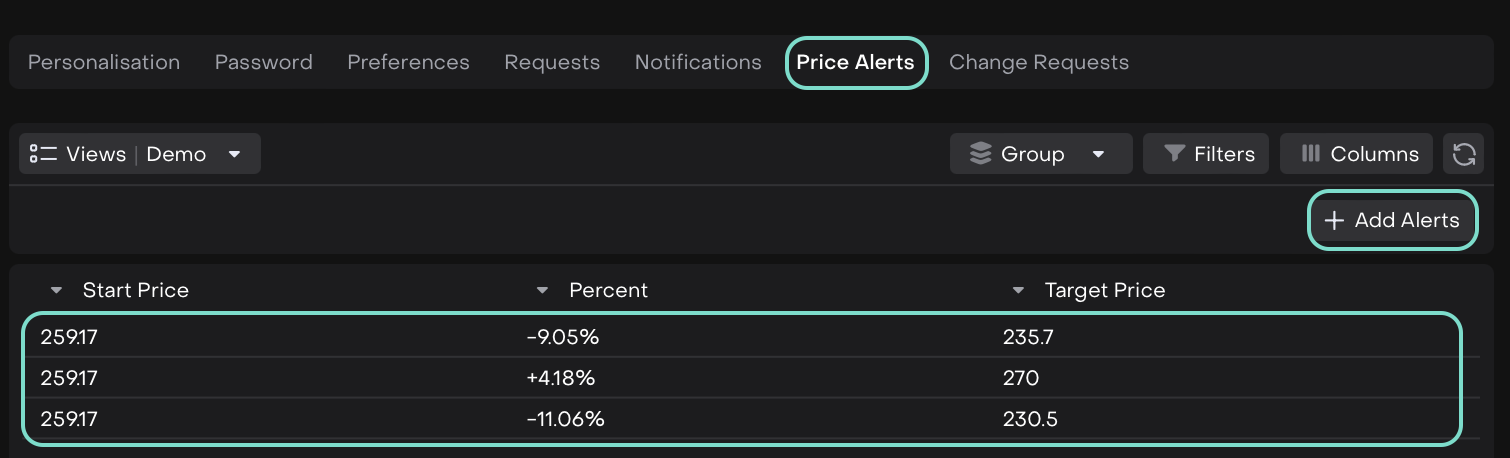
Go to Personal Settings > Find Price Alerts.
Or,
To add a new price alert, click the + Add Alerts button (or, simply view/manage the added alerts).
Select an Instrument to Add a Price Alert.
Set the Target Price, $ and Percent, % and click on green tick next to it.
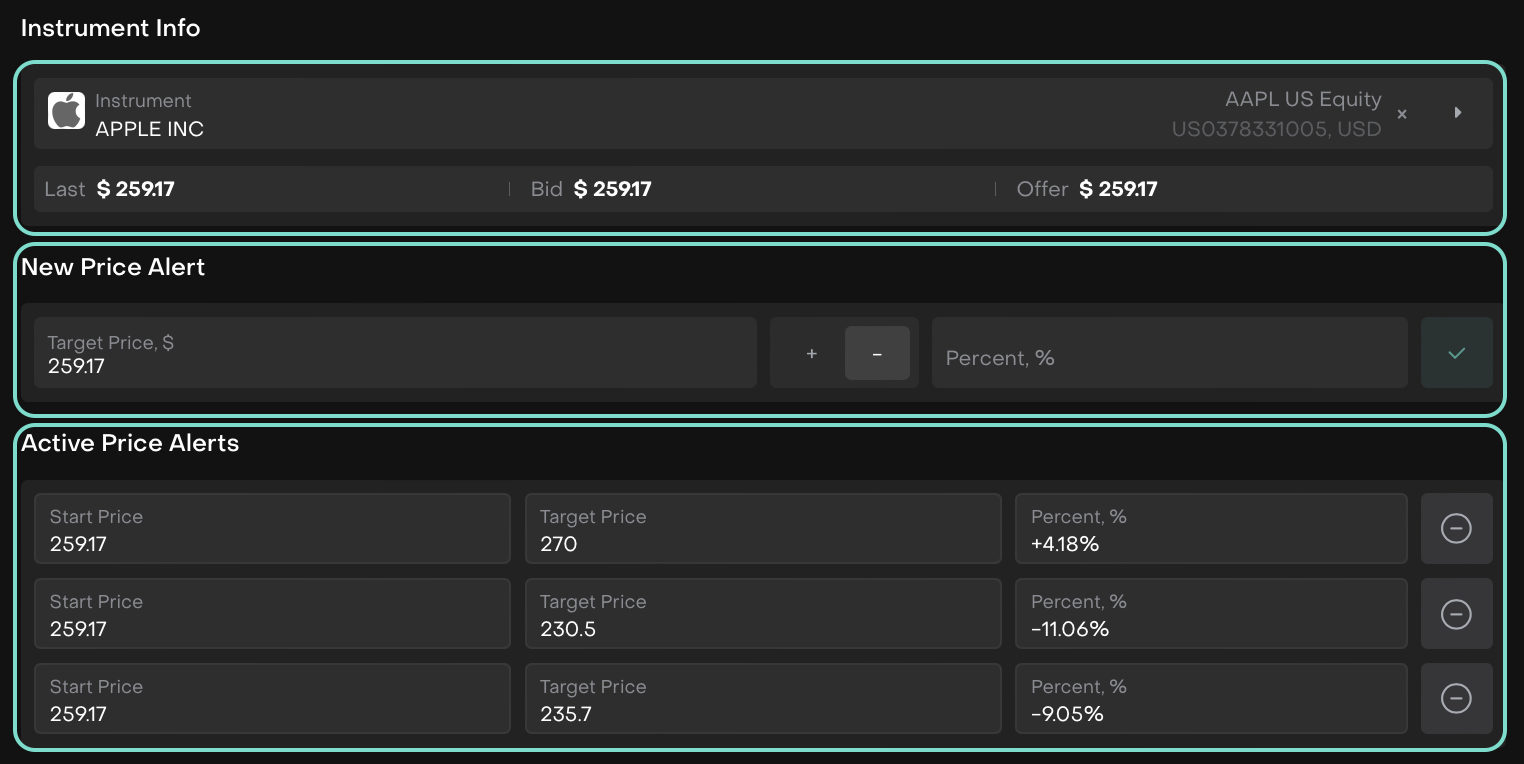
After adding the alert, you can monitor the active price alerts from the list below, which displays the Start Price, Target Price and the Percent change.
Then, Save Alerts.
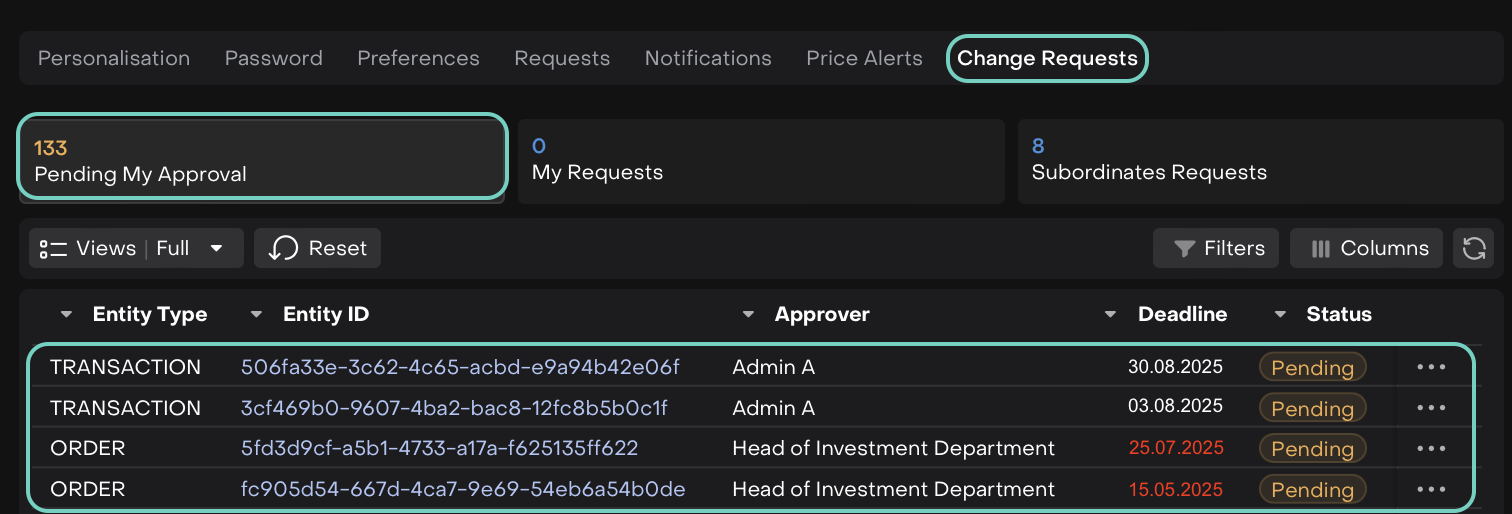
7. Change Requests
Find and select Change Requests tab.

You can track all Change Requests in three categories:
Pending My Approval – requests that require your action.
My Requests – requests you created, waiting for someone else’s approval.
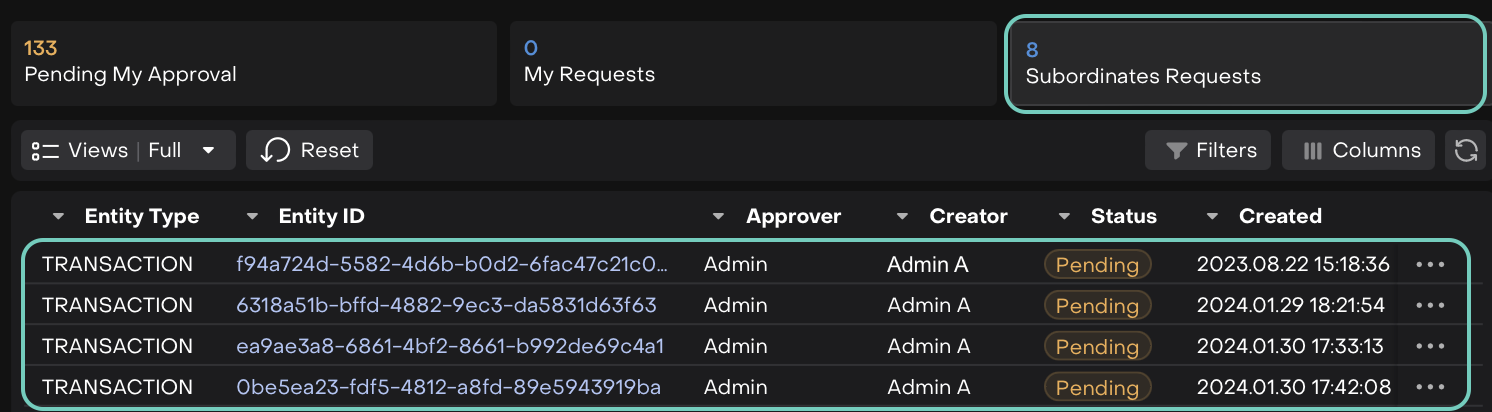
Subordinates’ Requests – requests submitted by your team members.
Double-click a Change Request to view its details and available actions.