
Import Orders Manually
AVAILABLE IN:
Introduction
There are times when orders are created or executed outside the platform, maybe by a custodian, a third-party broker or manually managed by your team. With the Order Import feature, you can easily bring these external orders into the platform to maintain a complete and auditable history.
This guide walks you through how to use the Order Import feature, the permissions you need and what each step means, from uploading or creating records to successfully posting them to the Orders tab.
Permission Requirement
To access and use the Order Import functionality, you must have the following permissions:
Permission | Needed For |
|---|---|
MANUAL IMPORT ORDER CREATE | To create or upload new orders using import options |
MANUAL IMPORT RDER VIEW | To view the Order Import screen and existing records |
MANUAL IMPORT ORDER MODIFY | To edit draft records and fix validation errors |
Key Terminologies
Term (A-Z) | Definition |
|---|---|
Import File | A CSV or XLSX file containing order details that you upload to the platform. |
Missing BA From/To | Indicates that either the source or destination bank account is missing. |
Missing Initiator | The person or entity who initiated the order is not specified. |
Missing Instrument | Indicates that the instrument (asset) field is missing or unmatched. |
Post Records | The action that moves successful draft records into the Orders tab. |
Successful Record | A record that has passed all validations and is ready to be posted. |
With Other Errors | Captures validation errors that do not fall into a predefined category. |
👉 New to some terms? Check our full Platform Glossary for quick definitions.
Where to Find It
You can access the Order Import feature in two ways:
From the Transactions Module
Go to
Transactions > Orders tabClick the Import button on the top-right corner
You'll be redirected to the Import tab and then click Import File (as shown below).
From the Dashboard
Click on Import in the main dashboard
Switch to the Orders tab
Click Import File

Step-by-Step Guide for Creating Orders
The new stepper-based flow breaks down order creation into clear steps:
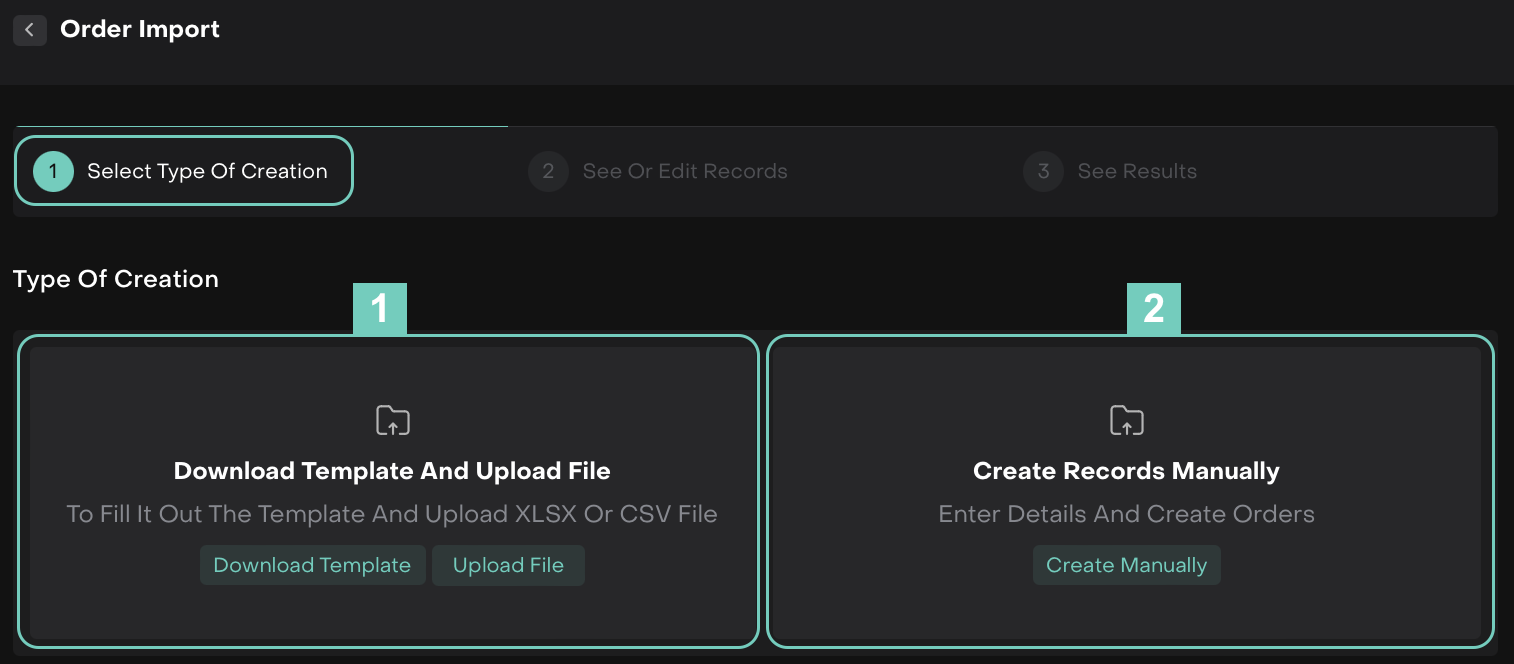
Step 1: Select Type of Creation
You have two ways to begin the import process:
1. Download Template and Upload File
Click Download Template
Fill out the order details in the provided
.xlsxor.csvfileClick Upload File to import the data into the platform
Once the file is loaded, you'll move to Step 2.
2. Create Records Manually
Choose this if you want to input data one record at a time
Click Add Record and manually fill out all order fields
On its click, you'll directly move to Step 2.
Step 2: See or Edit Records
Here, you'll see all imported or created records categorized into validation blocks.
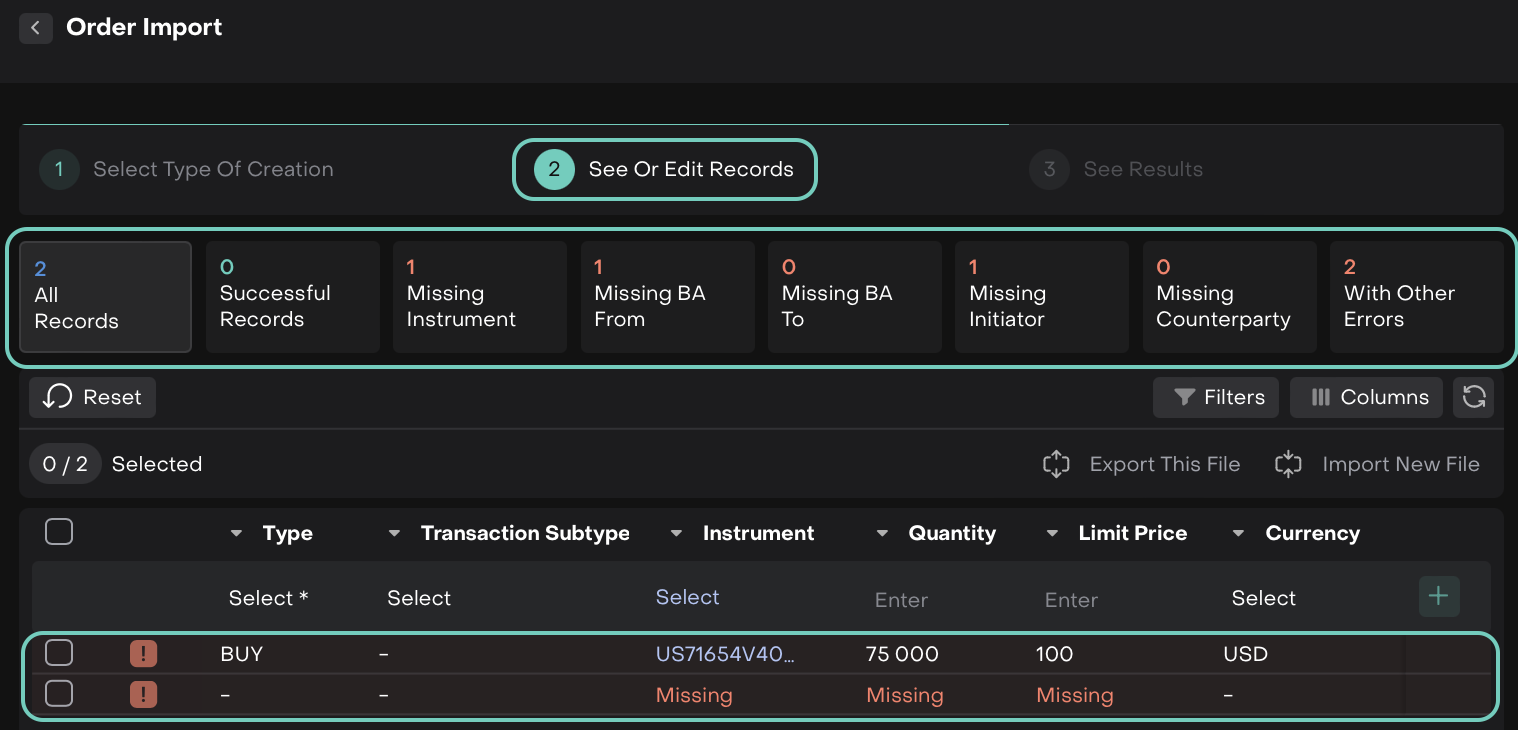
You cannot fix errors directly in the table view. You must click into each validation block to fix records individually.
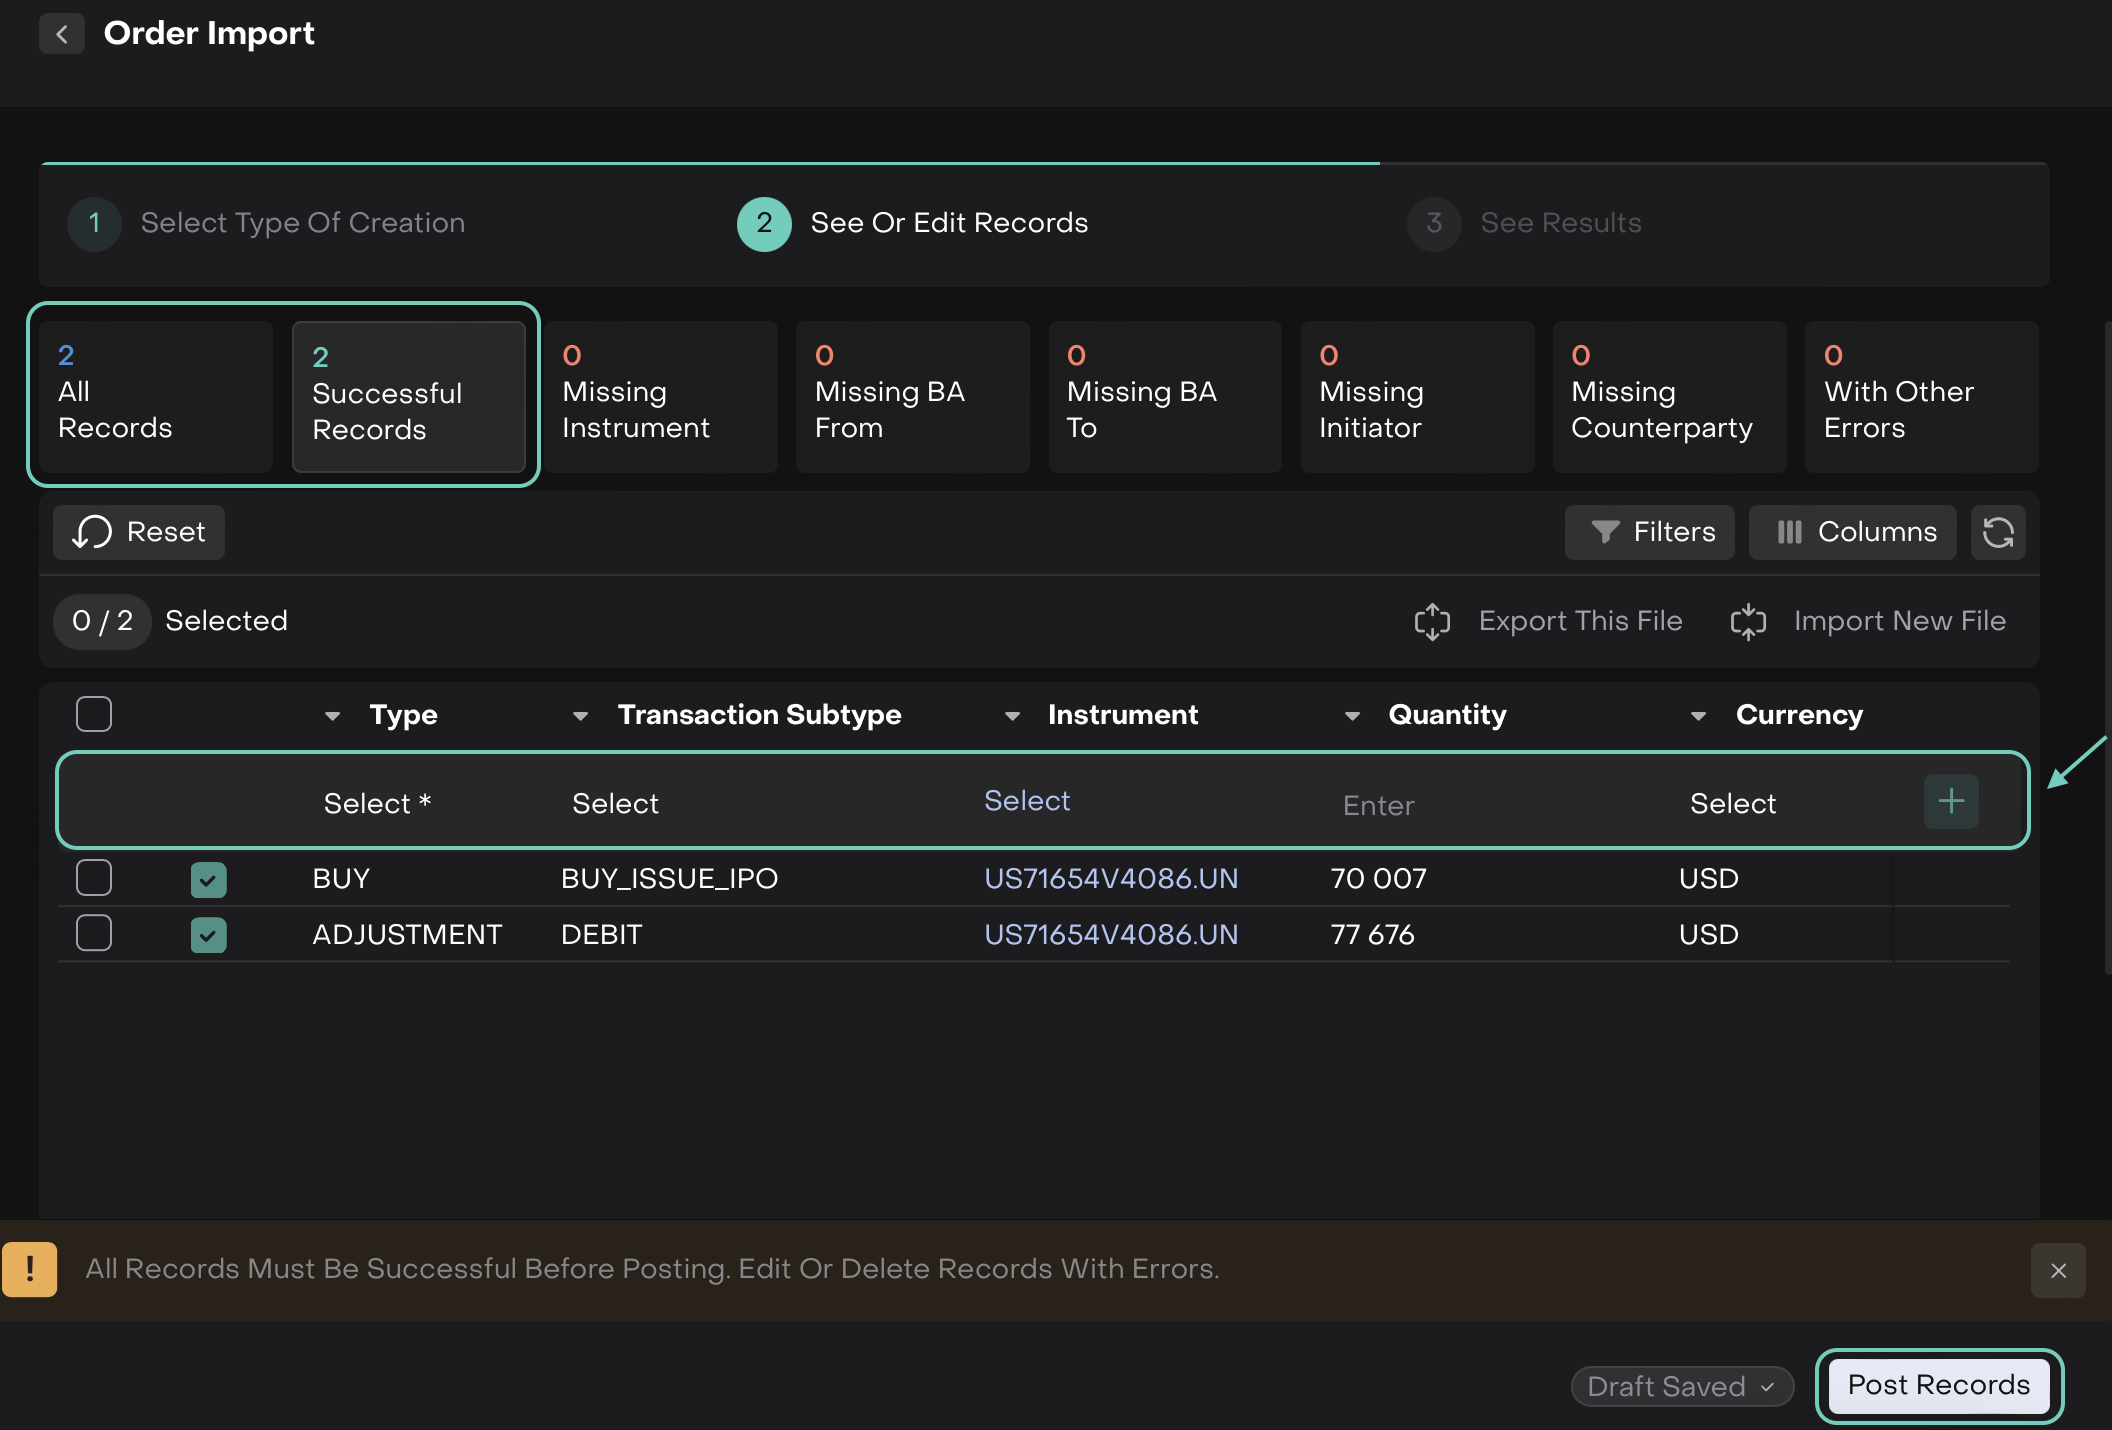
Default Buttons in All Record Blocks
Depending on the validation outcome of your uploaded file, different categories of draft records may appear. Each category offers a specific set of buttons to help you act on the records efficiently:

Make sure all issues are resolved so that Successful Records = All Records.
Once all records are marked successful:
The Post Records button will be enabled
Click it to push all records to the Orders module
Step 3: See Results
Once records are validated and posted, they’ll appear in the table.
Click on any row to review the full order details.
After posting, two confirmation tabs will appear:
Successfully Posted
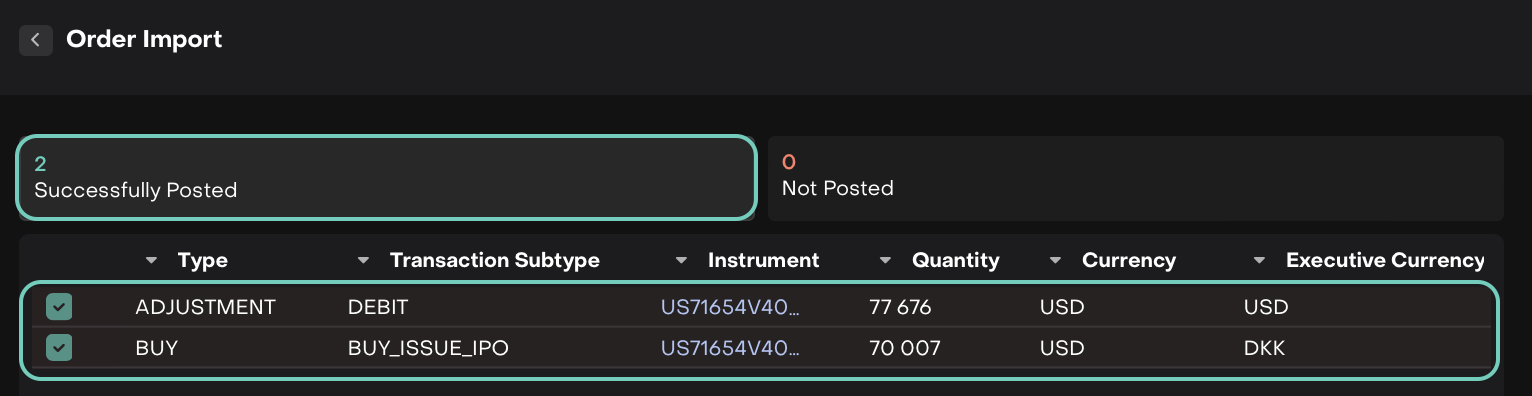
Not Posted
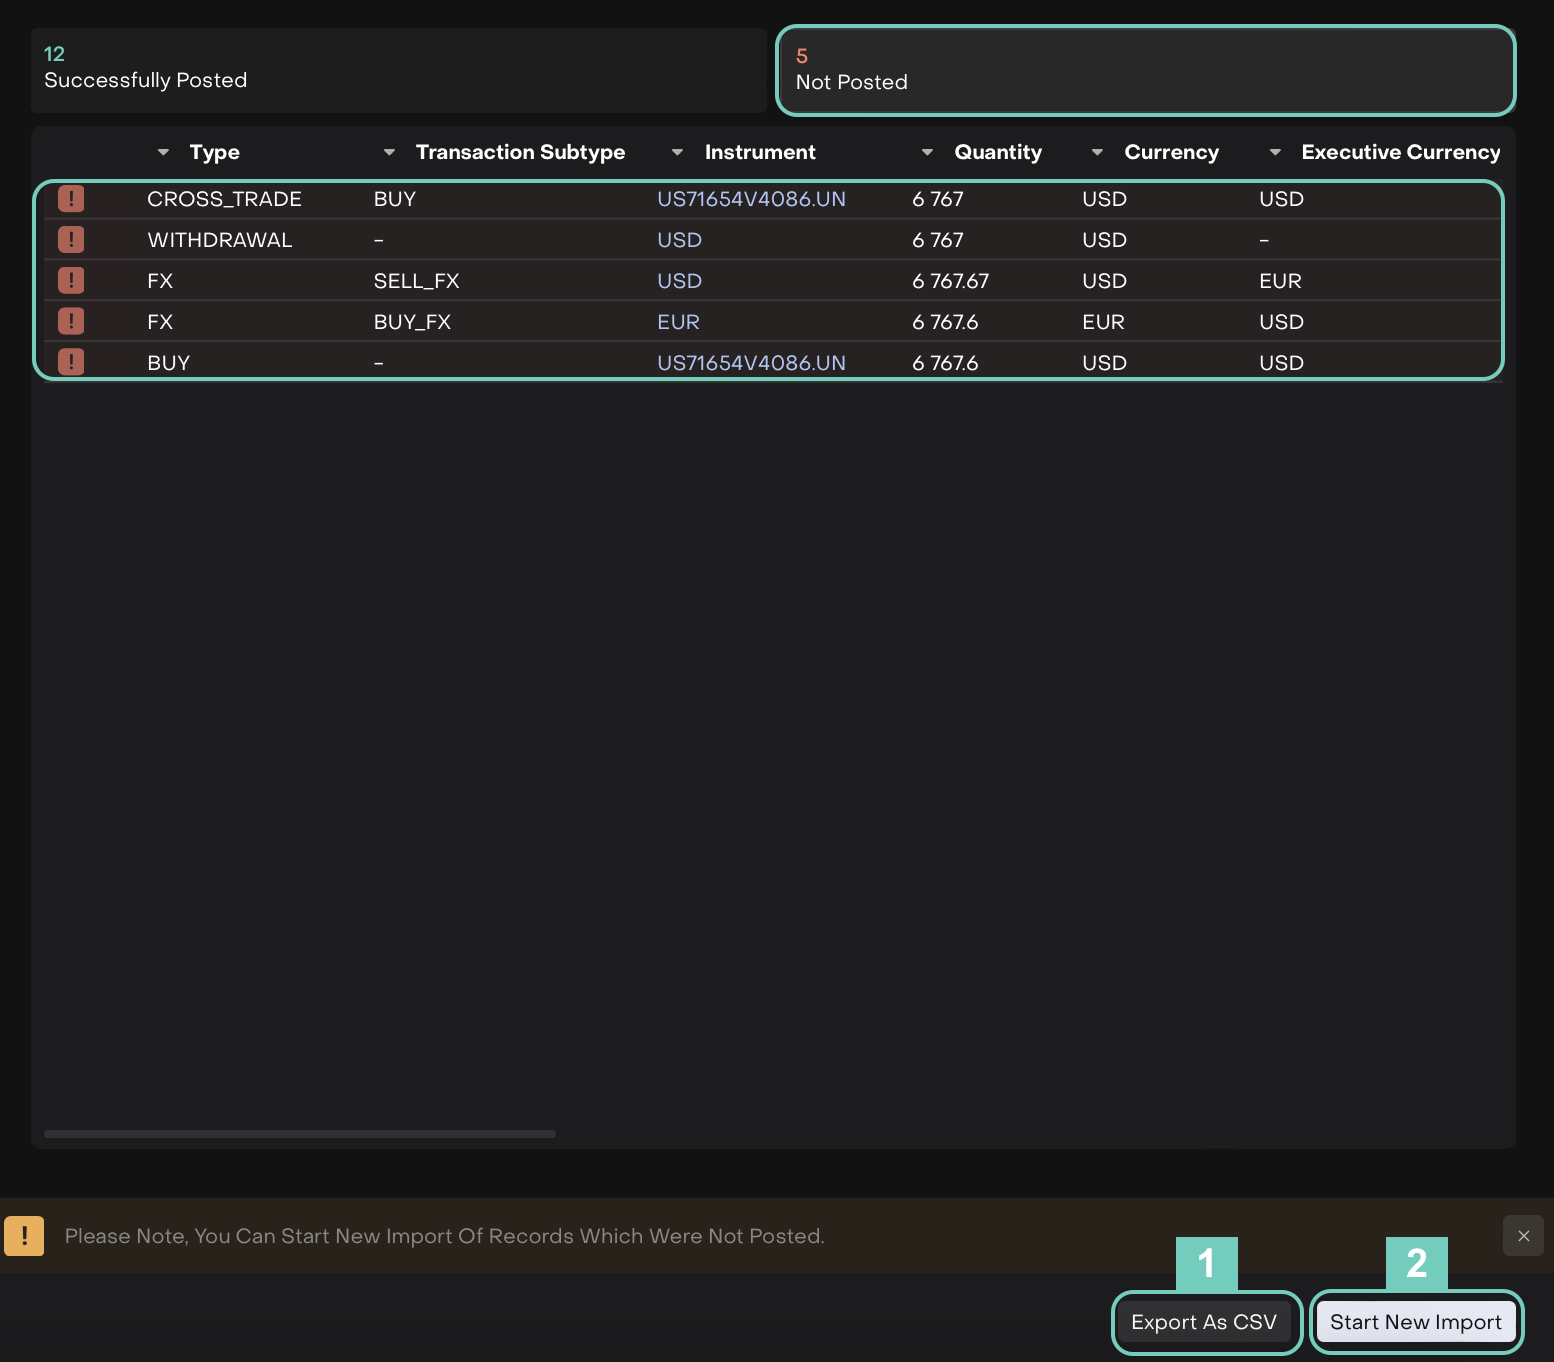
If any record couldn’t be posted, it will appear under the Not Posted tab for further action.
If any records fail to post, you can:
Export as CSV – to download failed records and fix them.
Start New Import – to re-import corrected records.
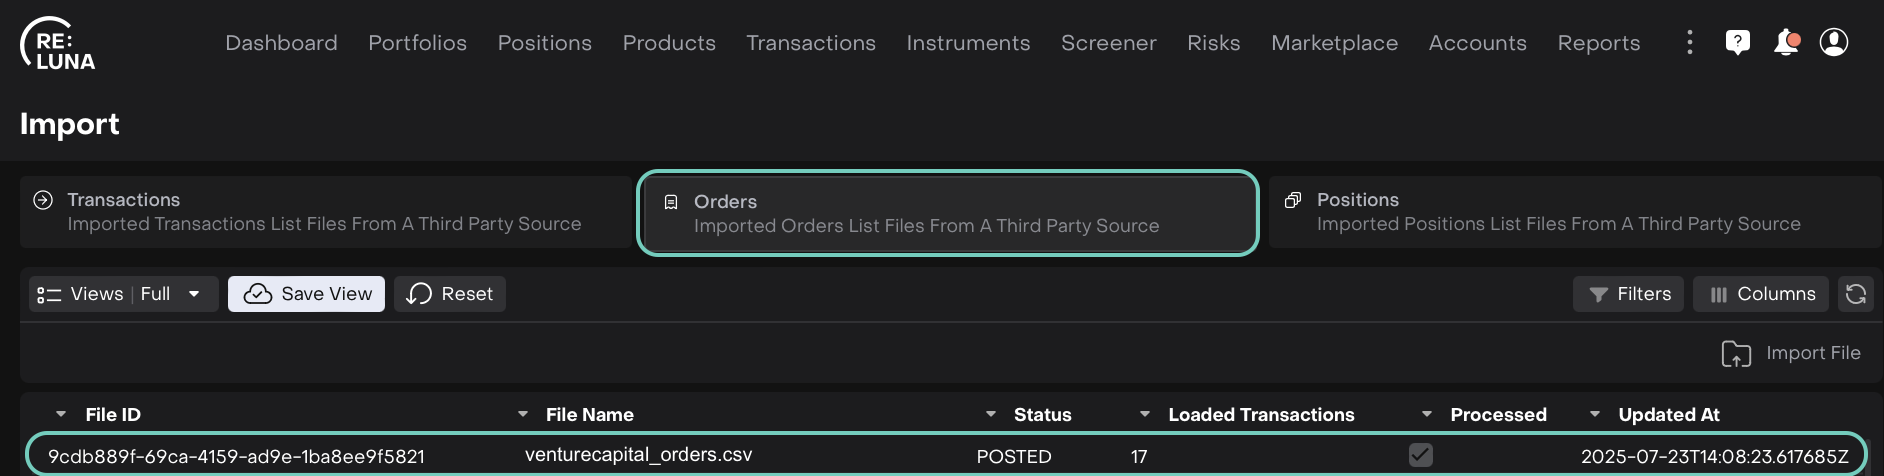
Final Step: View in Orders
Now that your records are posted:
Go to
Transactions > Orders tabUse filters if needed and locate your imported orders
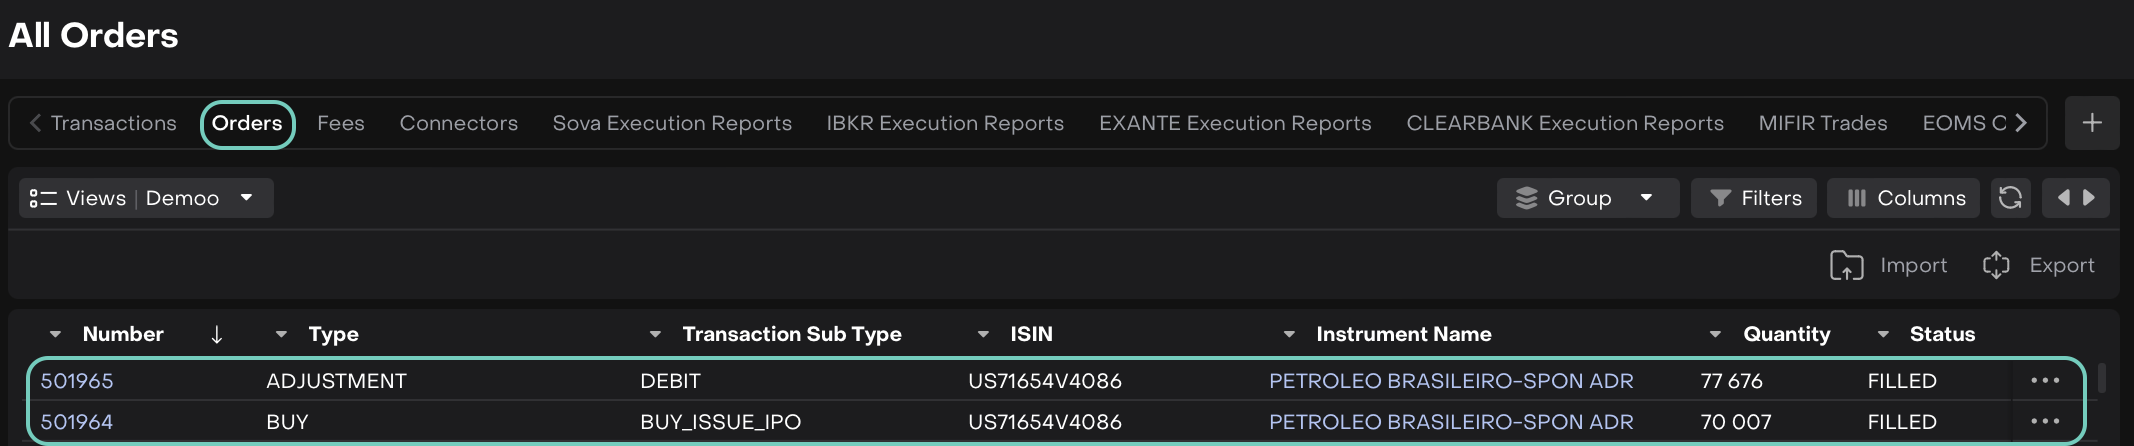
Their status will typically appear as Filled, meaning they're ready for review, execution or further actions.