
Manage Custom CVR Templates
AVAILABLE IN: 

Introduction
Create, edit and manage your own CVR (Client Valuation Report) templates directly on the platform using the Custom CVR Template feature. You can define the structure, select the data to include and save templates for repeated use. Whenever you need them, quickly generate reports, make edits or download them, giving you complete flexibility and control over your CVR reporting.
Contact Support if you cannot access a report you are authorized to view.
Key Terminologies
Term (A-Z) | Definition |
|---|---|
Client Reports | A section under the Reports module where you can view, generate and manage all client-related reports including CVRs. |
Custom Note View | Allows you to manually enter or edit the “Important Notes” section to include personalized or report-specific content. |
Default Note View | Keeps the platform-generated or standard note section as is, without customization. |
Generate Report | The action that compiles data into a CVR format, based on the selected template and portfolio details. |
👉 New to some terms? Check out our full Platform Glossary for more.
Create Custom CVR Template
Navigate to Reports > Find Client Reports.
Click on Generate Report.

Select + Add Template to create a new custom CVR template.

A form opens — fill in all the required fields such as:
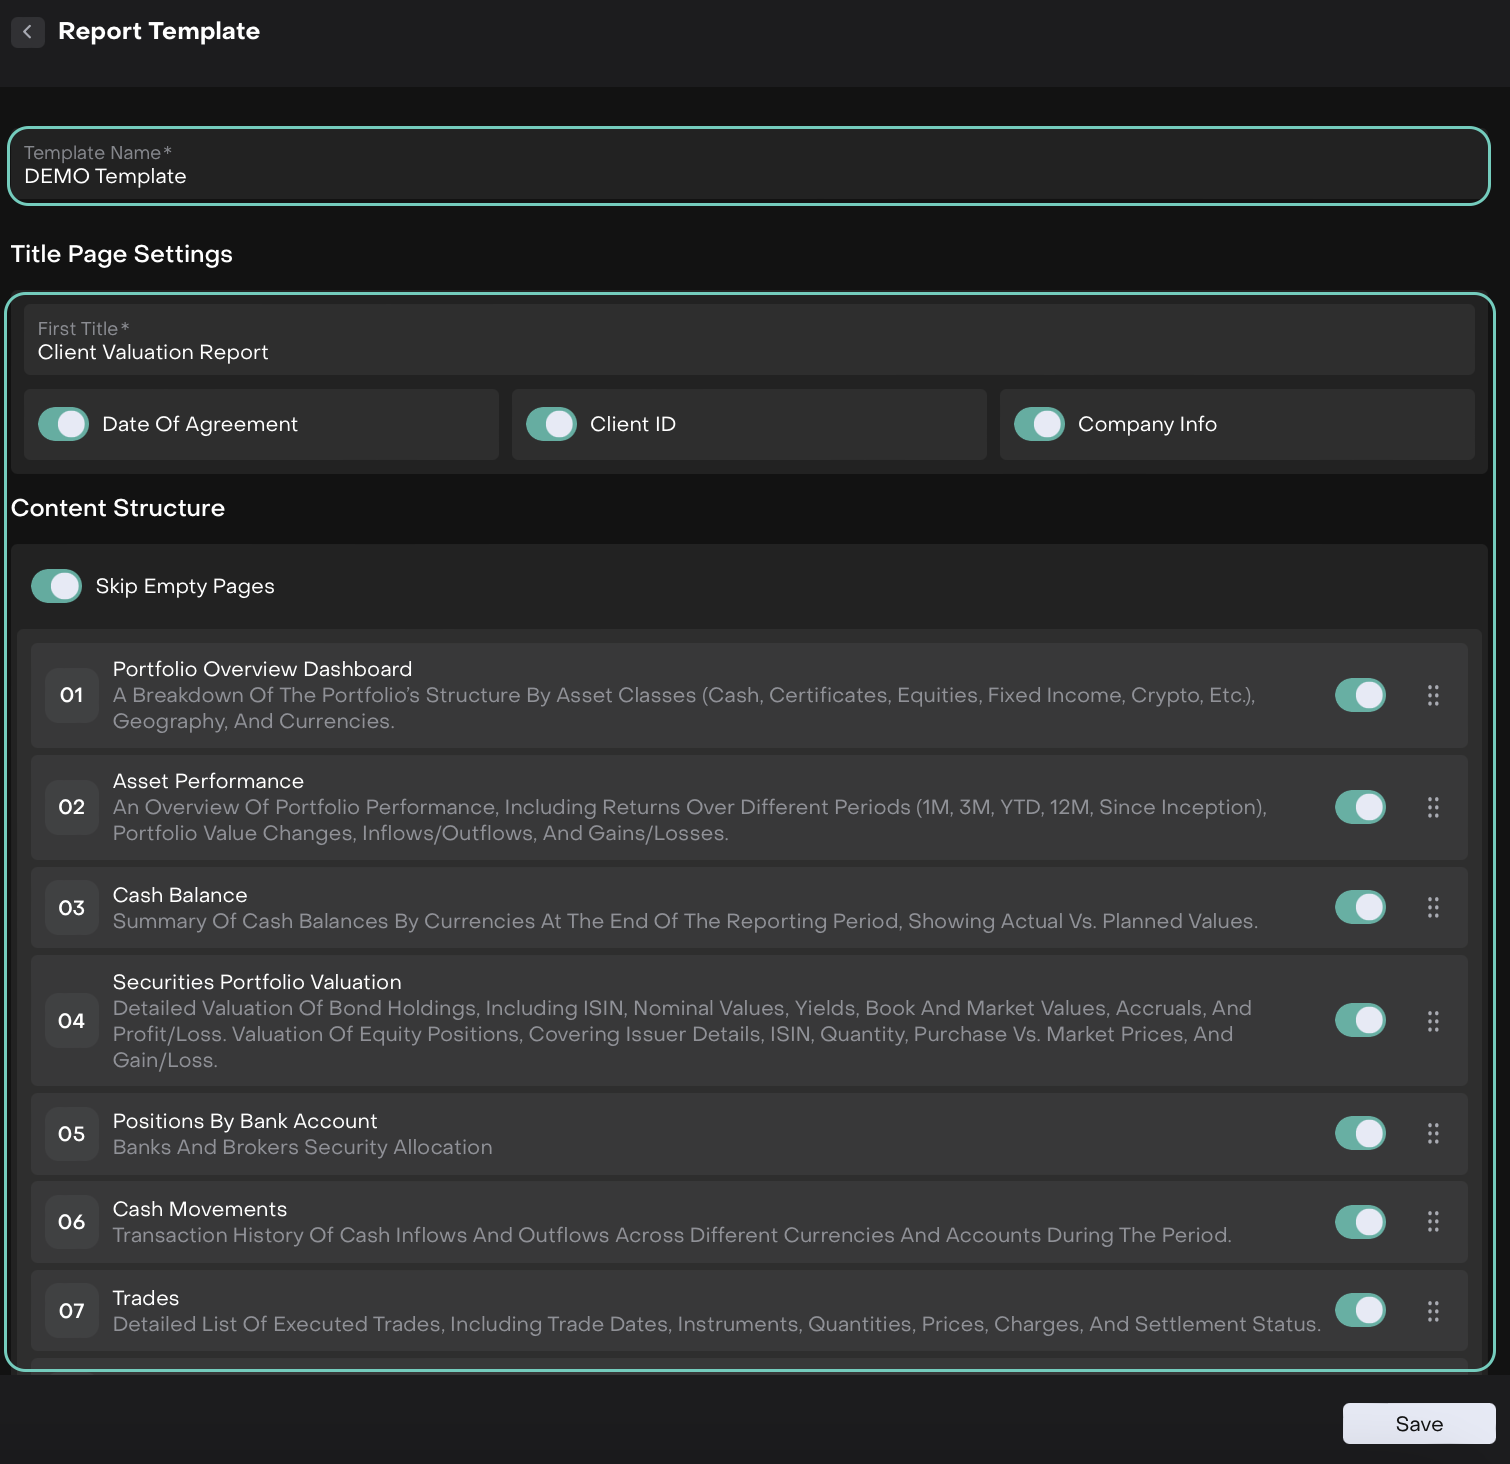
Field Name | Description |
|---|---|
Template Name* | Enter a unique Template name. |
First Title* | Enter the main title of the report. |
Date of Agreement | Toggle ON/OFF to display the agreement date. |
Client ID | Toggle ON/OFF to display the client identifier. |
Company Info | Toggle ON/OFF to include company or manager details on the title page. If you wish to exclude related manager/company details, disable Company Info. |
Skip Empty Pages | Enable this toggle to exclude sections on report without data. |
🔗 Learn more here on how to Manage CVR Reports.
Enter Important Notes and choose between:
Custom Note View – to enter your own notes.
Default Note View – to retain the standard notes.
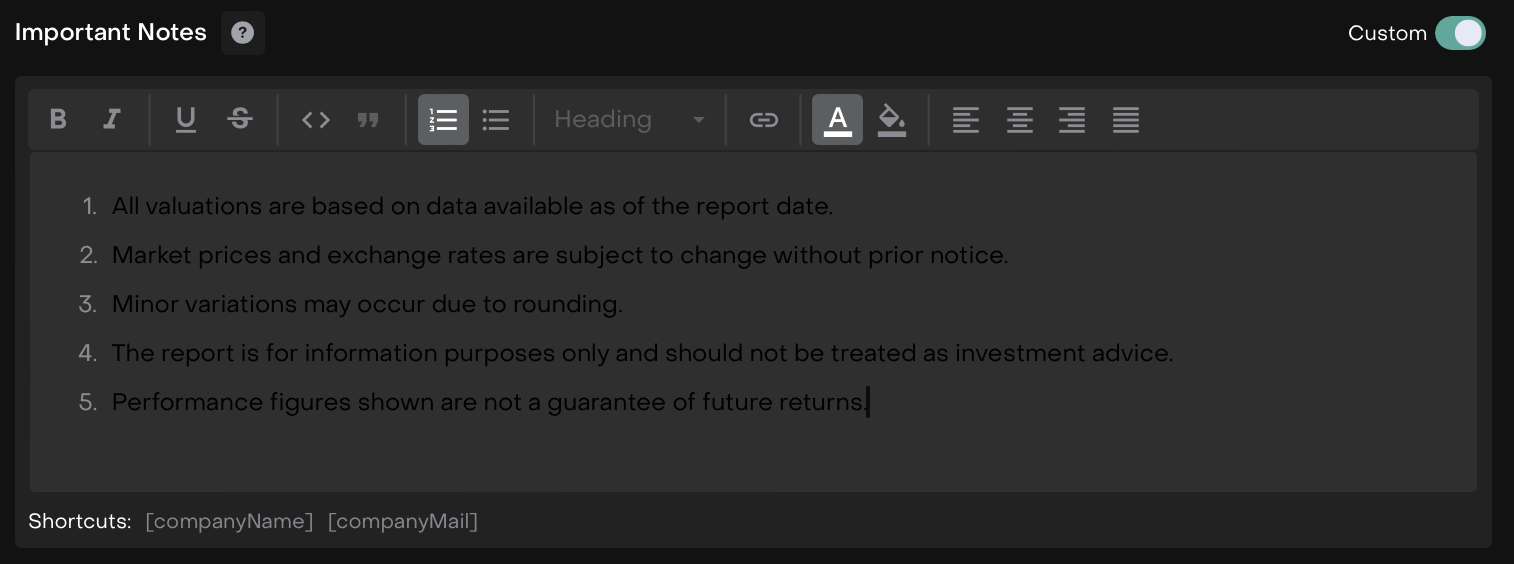
Custom Note View
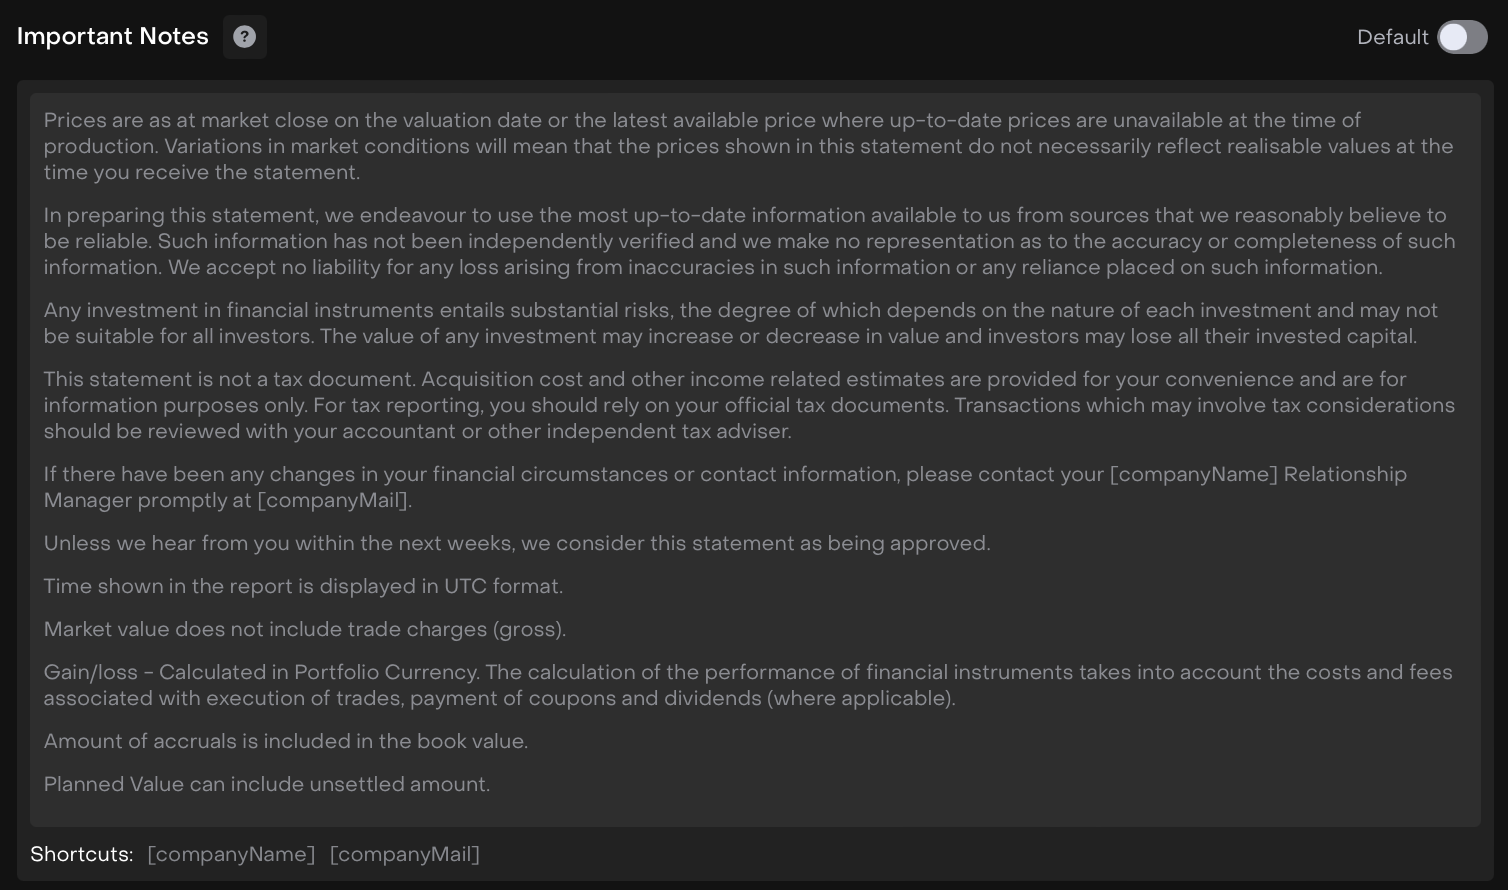
Default Note View
Once done, click Continue.
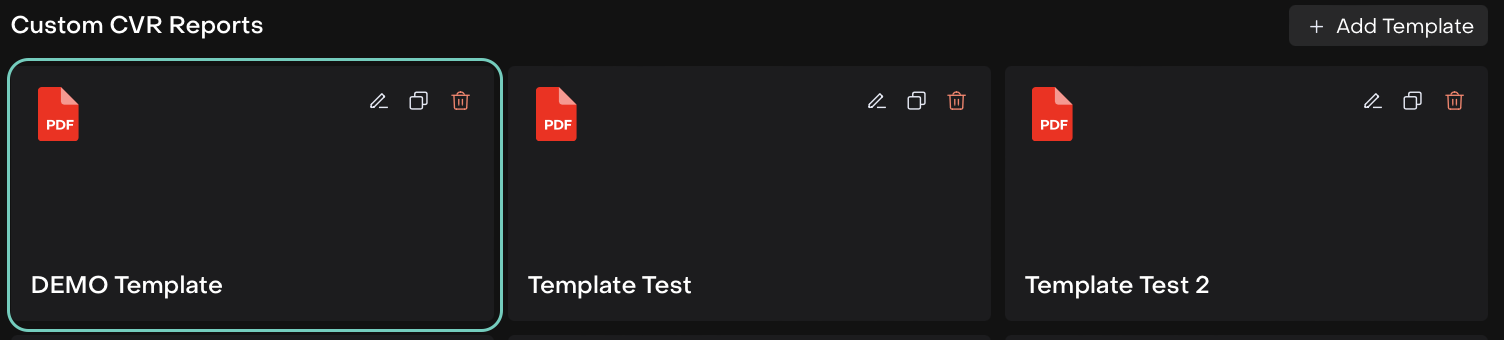
The template gets saved and appears on the block, as shown below.
Use and Manage Custom CVR Template
Find and open your saved template in the template block.
Or,
Use the action buttons to perform the following:
Edit – Modify template details or note sections.
Duplicate – Create a copy of the existing template.
Delete – Remove the template if it’s no longer needed.
Click Continue to move to the Portfolio Stepper and fill in the required portfolio details for the report.
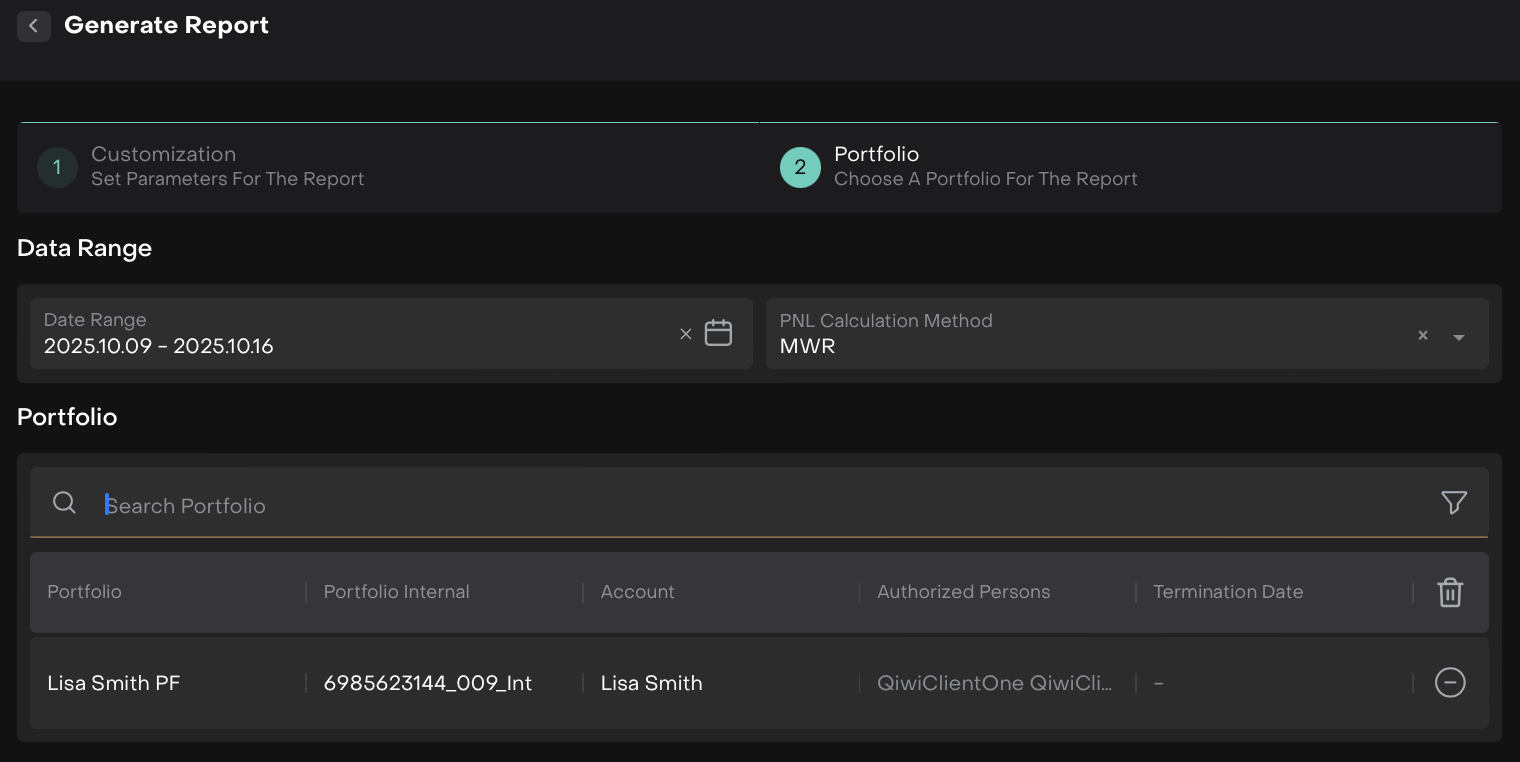
Once selected, click Generate Report.
The generated report will now appear in the Client Reports tab, ready for download, edits or approval.
Click the three-dots menu (…) beside any report to manage the report.
