
Deliver Reports to Clients
AVAILABLE IN: 

Introduction
You can easily manage and deliver your client reports directly from the Client Reports section. Once a report is generated, you can review it, approve it and choose how you’d like to share it, by downloading it manually or sending it automatically to your client.
This guide walks you through all available options to help you manage report delivery seamlessly.
Key Terminologies
Term (A-Z) | Definition |
|---|---|
Approve | Marks your report as verified and ready to be shared with the client. |
Bulk Action | Lets you select multiple reports and apply the same action (Approve, Reject or Send) to all at once. |
Client Report | A generated report that summarizes valuation, risk profile and performance data for a specific client or portfolio. |
Delete | Permanently removes the selected report from the platform. |
Download Report | Saves the report as a PDF on your device for manual sharing. |
Duplicate | Creates a copy of the report with the same configuration and filters. |
Reject | Marks your report as invalid or needing review before sending. |
Report Status | Indicates the current stage of your report — NEW, APPROVED, REJECTED, or SENT. |
Send to Client | Sends your approved report automatically to the client’s email. |
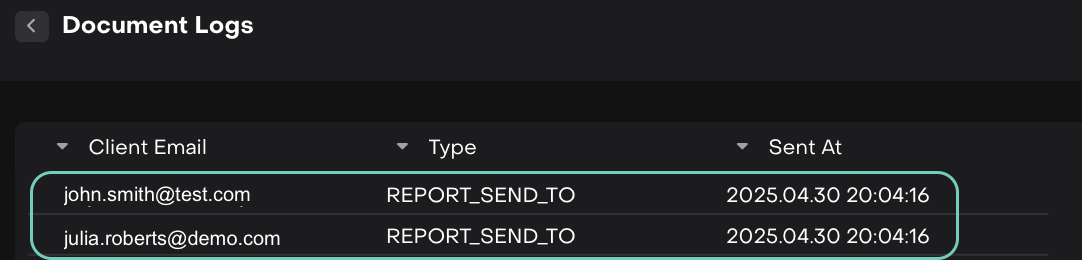
Sent Logs | Displays the delivery history of the report, including client email, report type, and sent timestamp. |
User Logs | Shows which user viewed, downloaded, or interacted with the report. |
👉 New to some terms? Check out our full Platform Glossary for more.
Sharing Options – Manual vs Automatic
When your report is approved, you have two ways to share it with your client:
Sharing Method | How It Works | When to Use |
|---|---|---|
Download and Share Manually | Use Download PDF to save the report to your device, then send it manually via email or another communication channel. | When you prefer a personal review before sharing or want to attach the report with additional notes. |
Send Automatically | Use Send to Client to deliver the report directly to your client’s registered email. The client will receive the PDF along with any default message configured in your platform. | When you want to streamline the process and send approved reports instantly. |
Accessing and Managing Reports
Once a report is created, it appears on the Client Reports list. From here, you can manage existing reports or take action on new ones.
Before receiving reports by email, you must toggle “Subscribe For Emails” inside Portfolios > Authorized Persons tab.
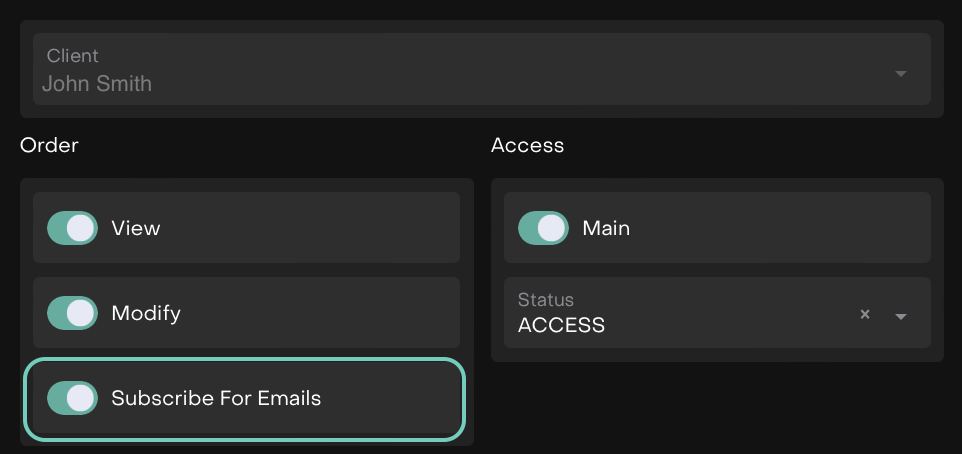
Reports will only be delivered automatically once this setting is enabled.
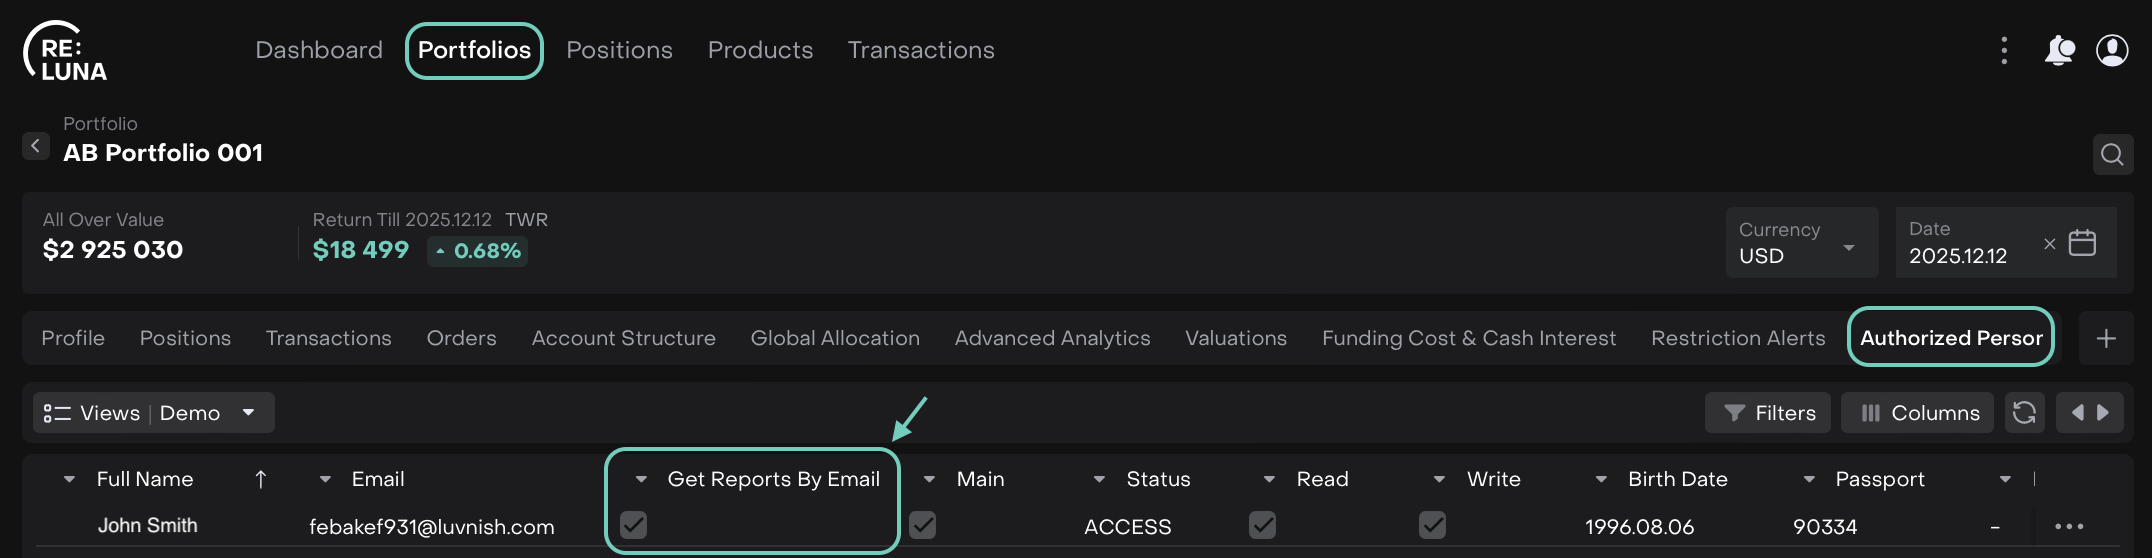
🔗 Learn more here on how to manage Authorized Persons on platform.
To Manage a Report:
Go to Reports > Client Reports > Client Valuation Report.
Click directly on a report row to access its available actions:
Approve – Mark the report as approved.
Reject – Reject the report.
Send to Client – Send it to the client, if approved.

Tick the checkbox to select single or multiple reports for bulk actions.
Approval Validation:
Reports must have Status: NEW to be approved.
Only reports with Status: APPROVED can be sent to clients.
Rejection Validation:
Only reports with Status: NEW or Status: APPROVED can be rejected.
Field Name | Definition | What it Means |
|---|---|---|
ID | Unique identifier for the report | Each report has a distinct ID to track and reference it |
Type | Category of the report | Indicates whether the report is a CLIENT_VALUATION_REPORT, COUPON_PROJECTIONor PNL |
Status | Current state of the report | Shows if the report is New, Approved or Rejected |
Last Send Status | Outcome of the last attempt to send the report to client | Indicates if the report was SENT successfully, IN_PROGRESS or encountered a SEND_ERROR When a report shows “Send Error, the platform highlights it. Hover over the icon to see the issue.  |
Portfolio Name | Name of the associated portfolio | Identifies which portfolio the report belongs to |
Request Date Time | Date and time when the report was requested | Shows when the report generation was initiated |
Start Date | Start date of the reporting period | Defines the beginning of the data range included in the report |
End Date | End date of the reporting period | Defines the end of the data range included in the report |
Large reports with multiple portfolios or long data ranges may take a few moments to process.
Alternatively, use the three-dots menu to access the following actions:

Action Add a comment | Description | When to Use | Effect / Result |
|---|---|---|---|
Download | Save the report as a PDF to your device | When you need an offline copy or want to share it | The report PDF is downloaded and can be opened or shared externally |
Delete | Remove the report from the platform | When the report is no longer needed or is outdated | The report is permanently removed from the list |
Approve | Mark a report as approved | After verifying the report is accurate and ready | Only approved reports can be sent to clients |
Reject | Mark a report as rejected | If the report contains errors or requires changes | The report status changes to Rejected; it cannot be sent to clients or approved |
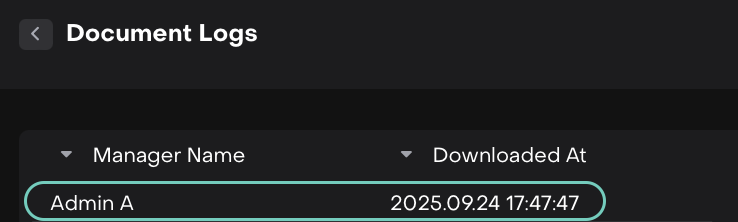
User Logs | View activity of users interacting with the report | To track who accessed or downloaded the report | On click of it, the pop up shows:
 |
Sent Logs | View history of report delivery to clients | To confirm when and to whom the report was sent | On click of it, the pop up shows:
 |