Getting Started with Transactions
Introduction
The Reluna platform enables you to manage a wide range of transactions that impact your portfolios, whether you are buying securities, making transfers or processing corporate actions. This guide will help you understand the basics of transaction management and get started quickly.
Permission Requirements
To work with transactions, you need the following permissions:
Permission ID | Access Level | Required For |
|---|---|---|
| Modify | All transaction actions (Match, Activate, Approve, Allocate, Rollback, Reprocess, Deactivate) |
| Modify + Create | Allocate action |
| Multiple | Sync to MiFIR action |
If you don't have the required permissions, contact your Business Administrator.
Accessing Transactions
From the top menu:
Click Transactions
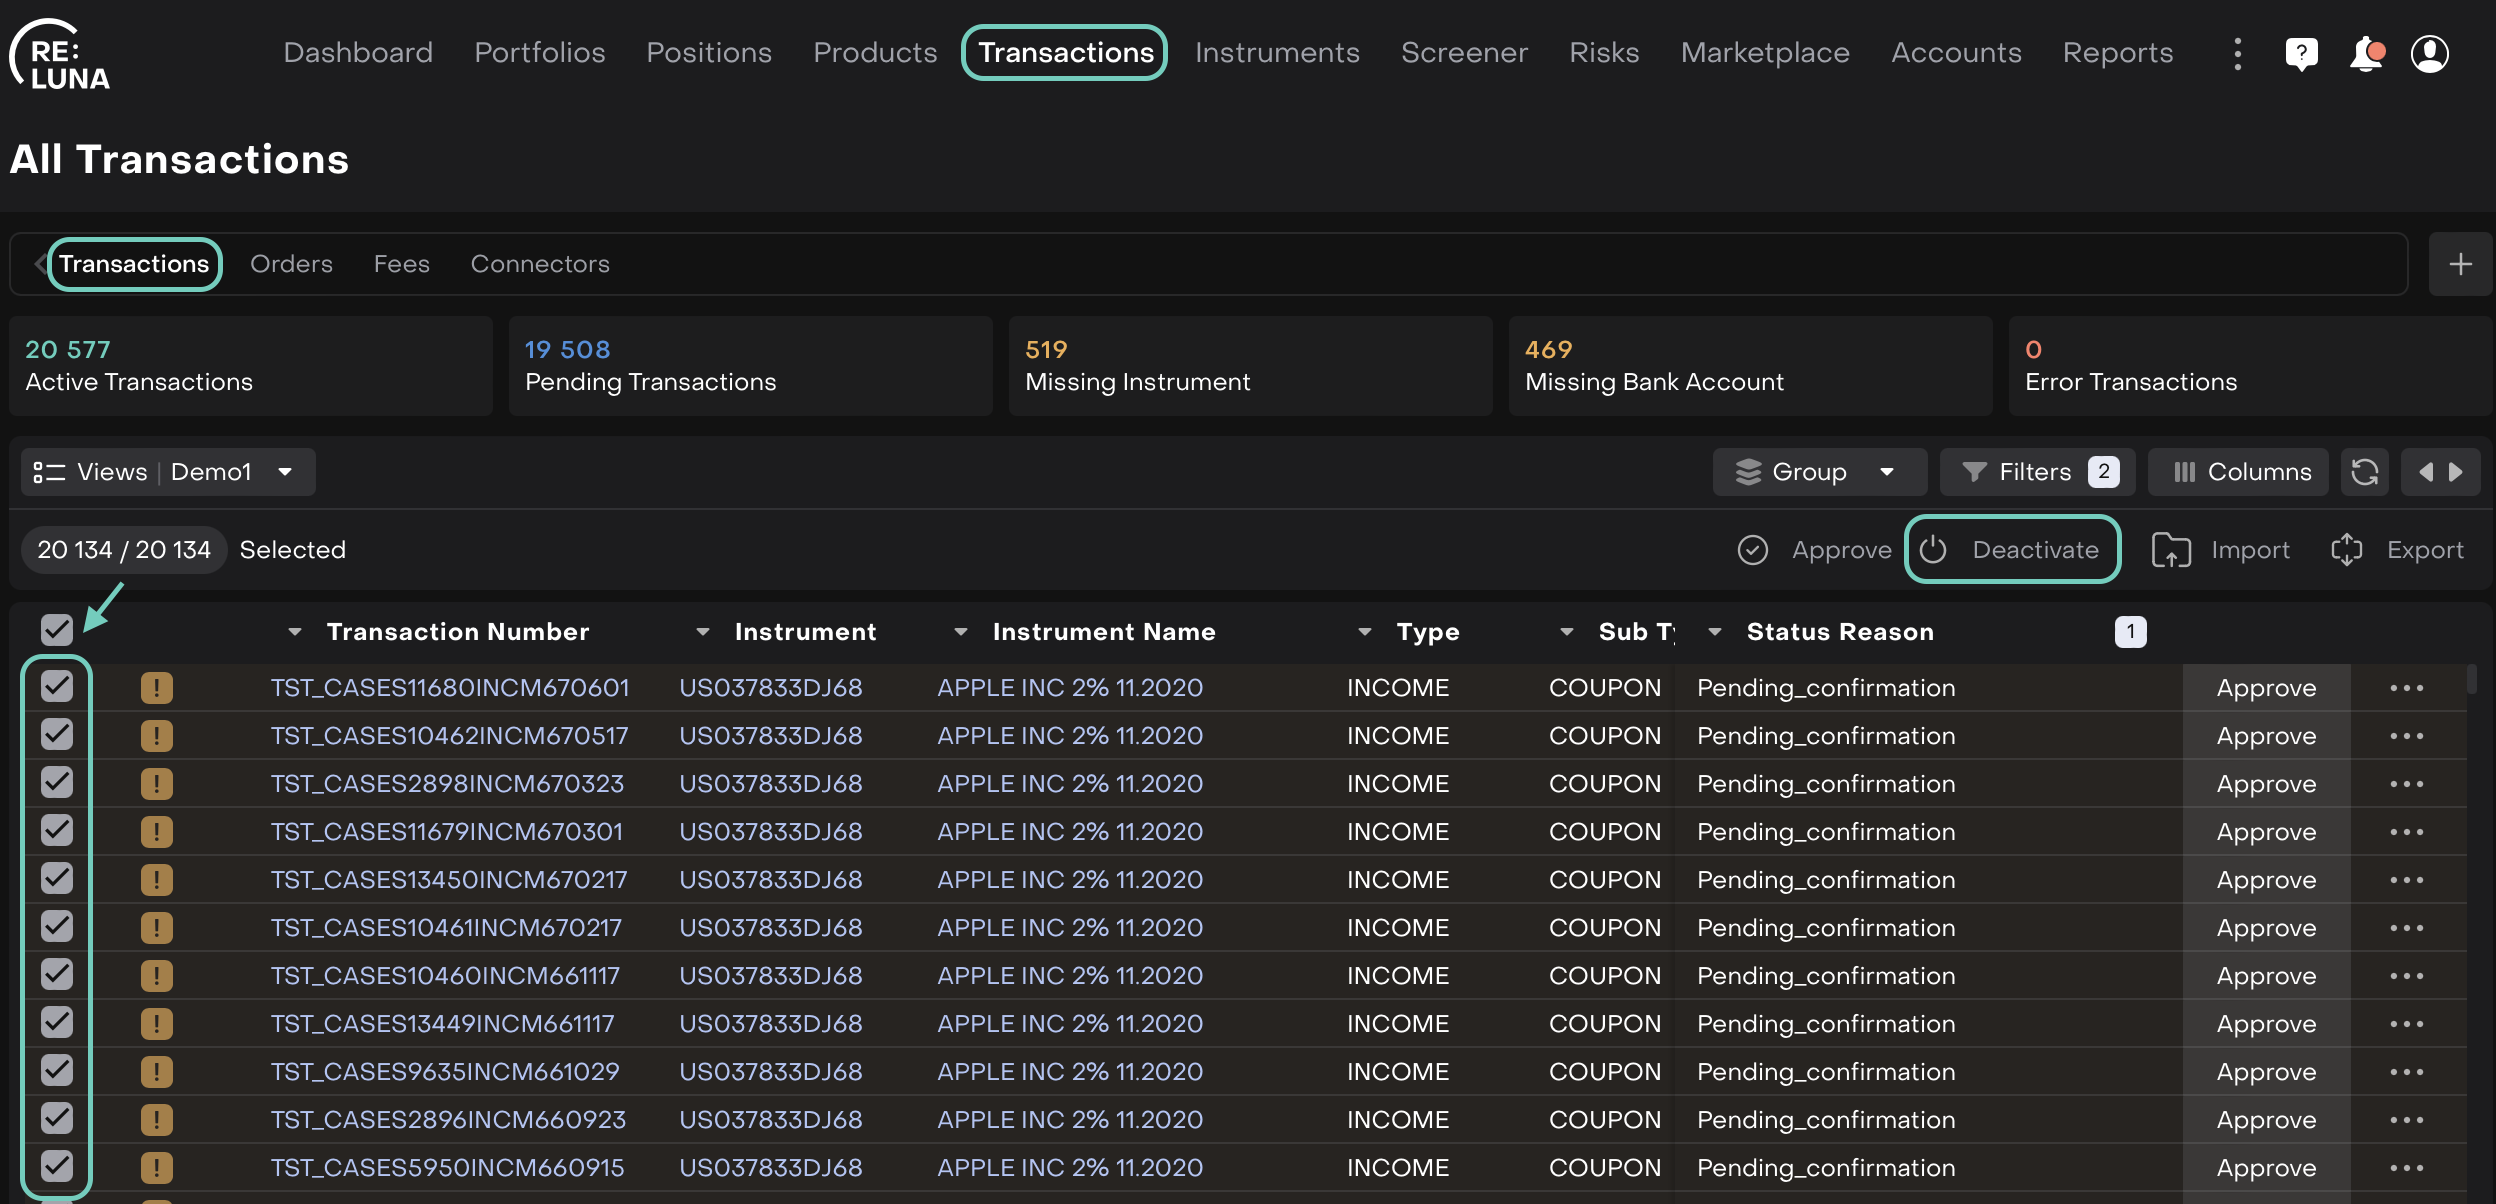
You will be redirected to the All Transactions dashboard
These real-time counters help you track operational issues and prioritize transaction clean-up.

Understanding the Dashboard
The dashboard displays real-time counters for different transaction categories. These counters help you track operational issues and prioritize transaction cleanup.
Counter | Description | What It Shows |
|---|---|---|
Active Transactions | Successfully created transactions | All transactions included in portfolio calculations |
Pending Transactions | Transactions awaiting approval or matching | Items requiring your attention |
Missing Instrument | Transactions with unlinked instruments | Needs instrument mapping |
Missing Bank Account | Transactions without defined bank accounts | Needs account assignment |
Error Transactions | Incomplete or incorrect entries | Technical or data issues |
Deactivated transactions are excluded from all counters.
Understanding Sources of Transaction Creation
Transactions can originate from various sources based on the platform or subscriptions. Some require manual matching while others are auto-processed using predefined rules, such as:
Transaction Source | How Transactions Are Created | Conditions for Availability |
|---|---|---|
Bank Files | Requires active integration with custodian(s) | Integration with custodians must be enabled |
Manual Entry | Created manually by Users | Manual creation is required when:
|
Platform-Generated Transactions | Automatically created based on platform settings (e.g., coupon, bond redemptions) | Requires a subscription that includes automated transaction generation |
Transactions From Orders | Generated when an order is executed | Requires a subscription that includes Order Management module and/or to coupon tracker |
Creating a New Transaction
On click of the ➕ icon:
A create transaction window opens.
Select the Transaction Type (e.g., Buy, Fee, Income, etc.)
Or,
Search the transaction type using the search bar.
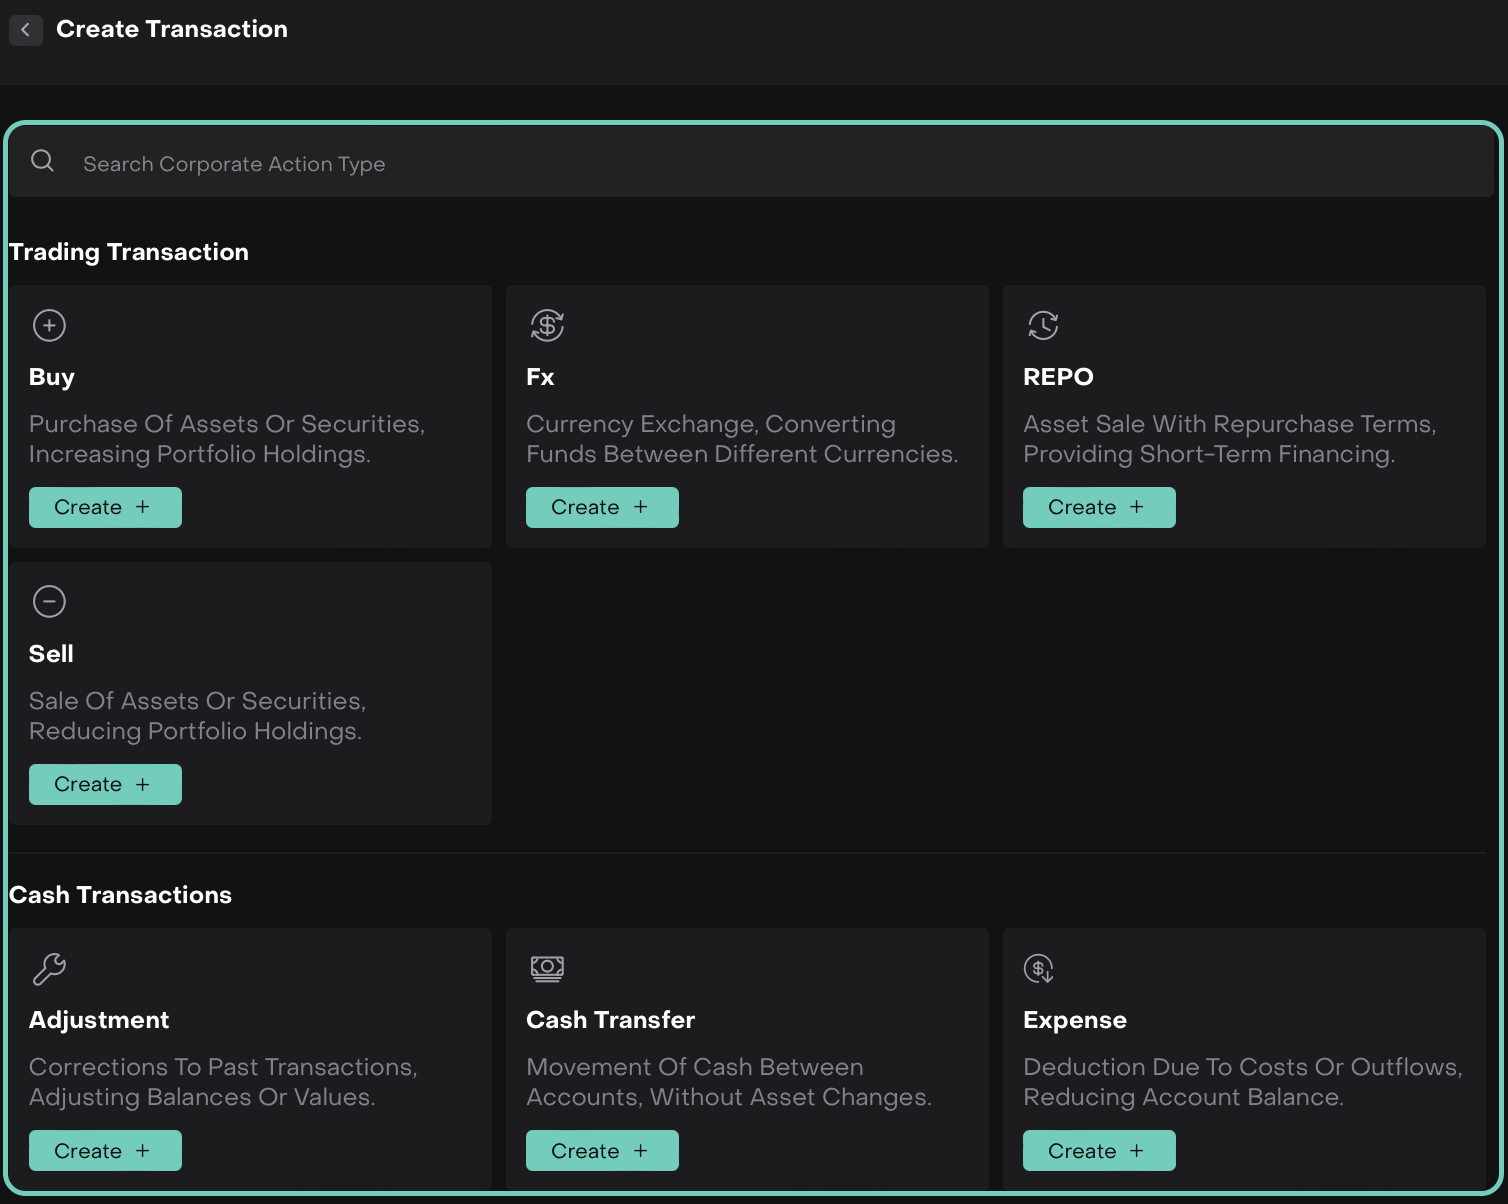
Once clicked on Create + the selected type’s transaction form opens.
🔗 Learn here on how to create or fill in transaction forms.
Managing Transactions in Bulk: Activate, Approve and Deactivate
The Reluna platform now offers enhanced control over transaction statuses via three new bulk actions: Activate, Approve and Deactivate. These actions can be performed directly from the Transactions tab and allow you to manage multiple transactions simultaneously based on their status.
Approving & Activating Transactions
Activation reinstates previously deactivated transactions (with Error status reason) so that they are again included in portfolio calculations. Approval is the preceding confirmation step that typically applies to transactions in a Pending state.
How to Approve or Activate Transactions:
Go to the Transactions Tab on dashboard.
Navigate via the top menu > Transactions tab.
Use checkboxes to select individual transactions or click Select All.
Click “Approve” or “Activate”:
The “Approve” button is shown for transactions in a
Pendingstate.
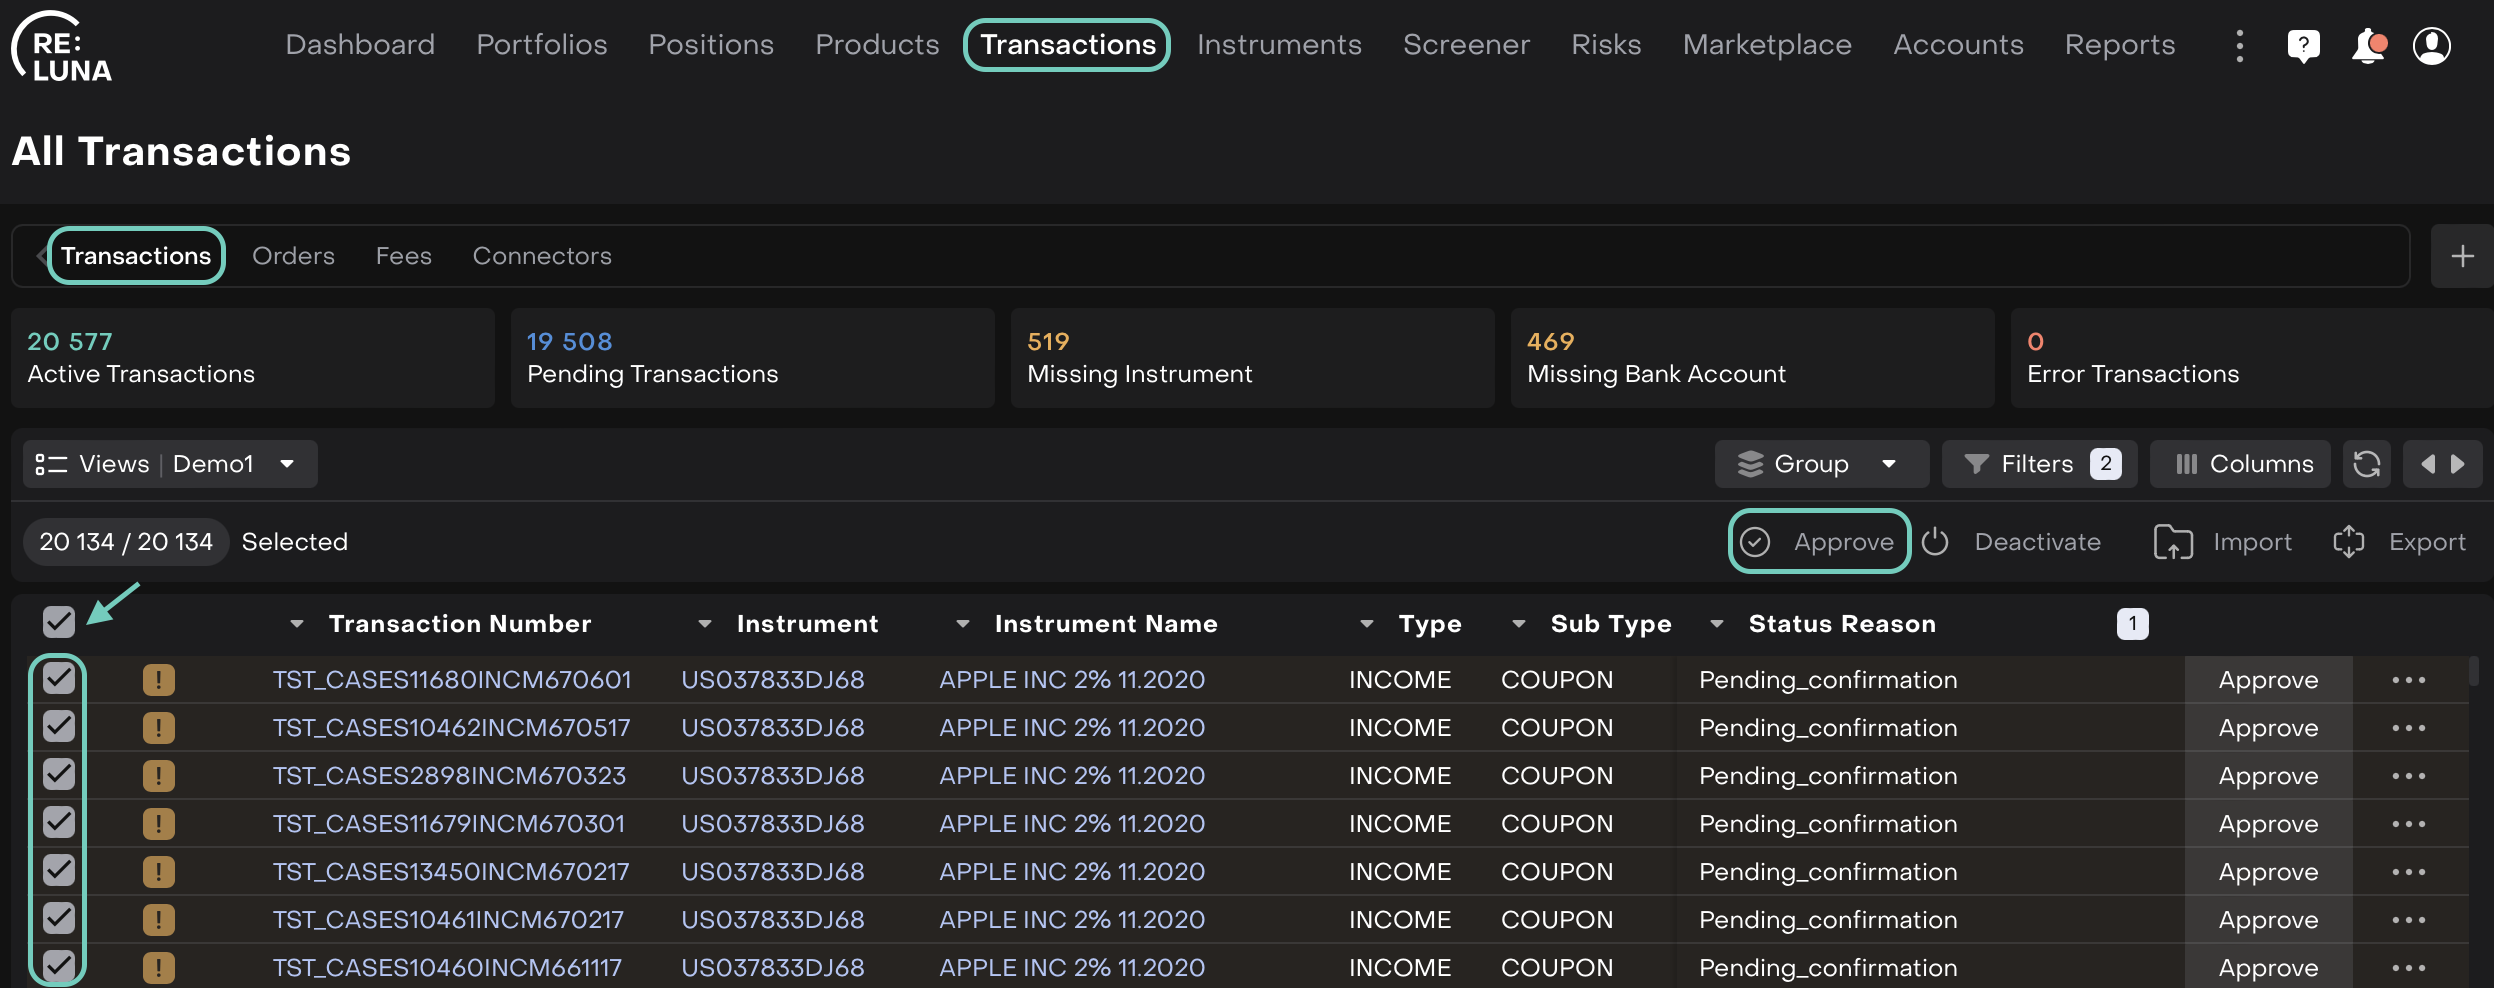
The “Activate” button is shown for transactions with an
Errorstatus.
Set Status Reason
Default reason for Approve is
Confirmed.Enter a required comment explaining the approval.
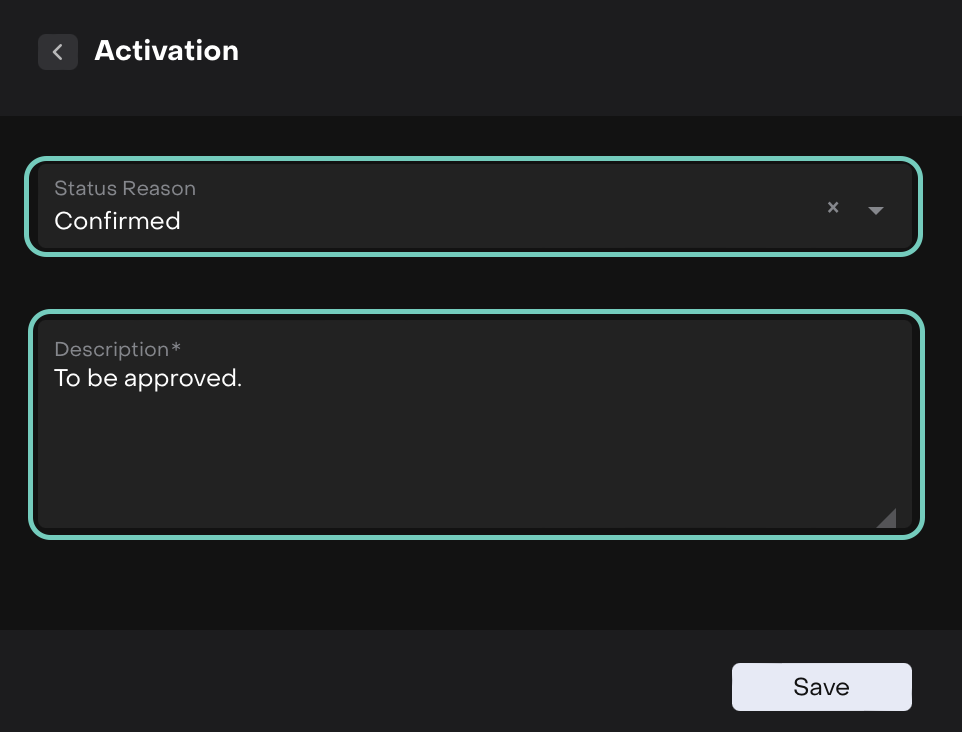
Click “Save” and the selected transactions are updated accordingly. Portfolio positions and relevant counters are recalculated.
When to Use Approve or Activate
Finalizing reviewed transactions from an import or integration.
Reinstating previously erroneous transactions after correcting data.
Moving from
Pendingto active status after review.Re-activating after resolving missing instrument or bank account links.
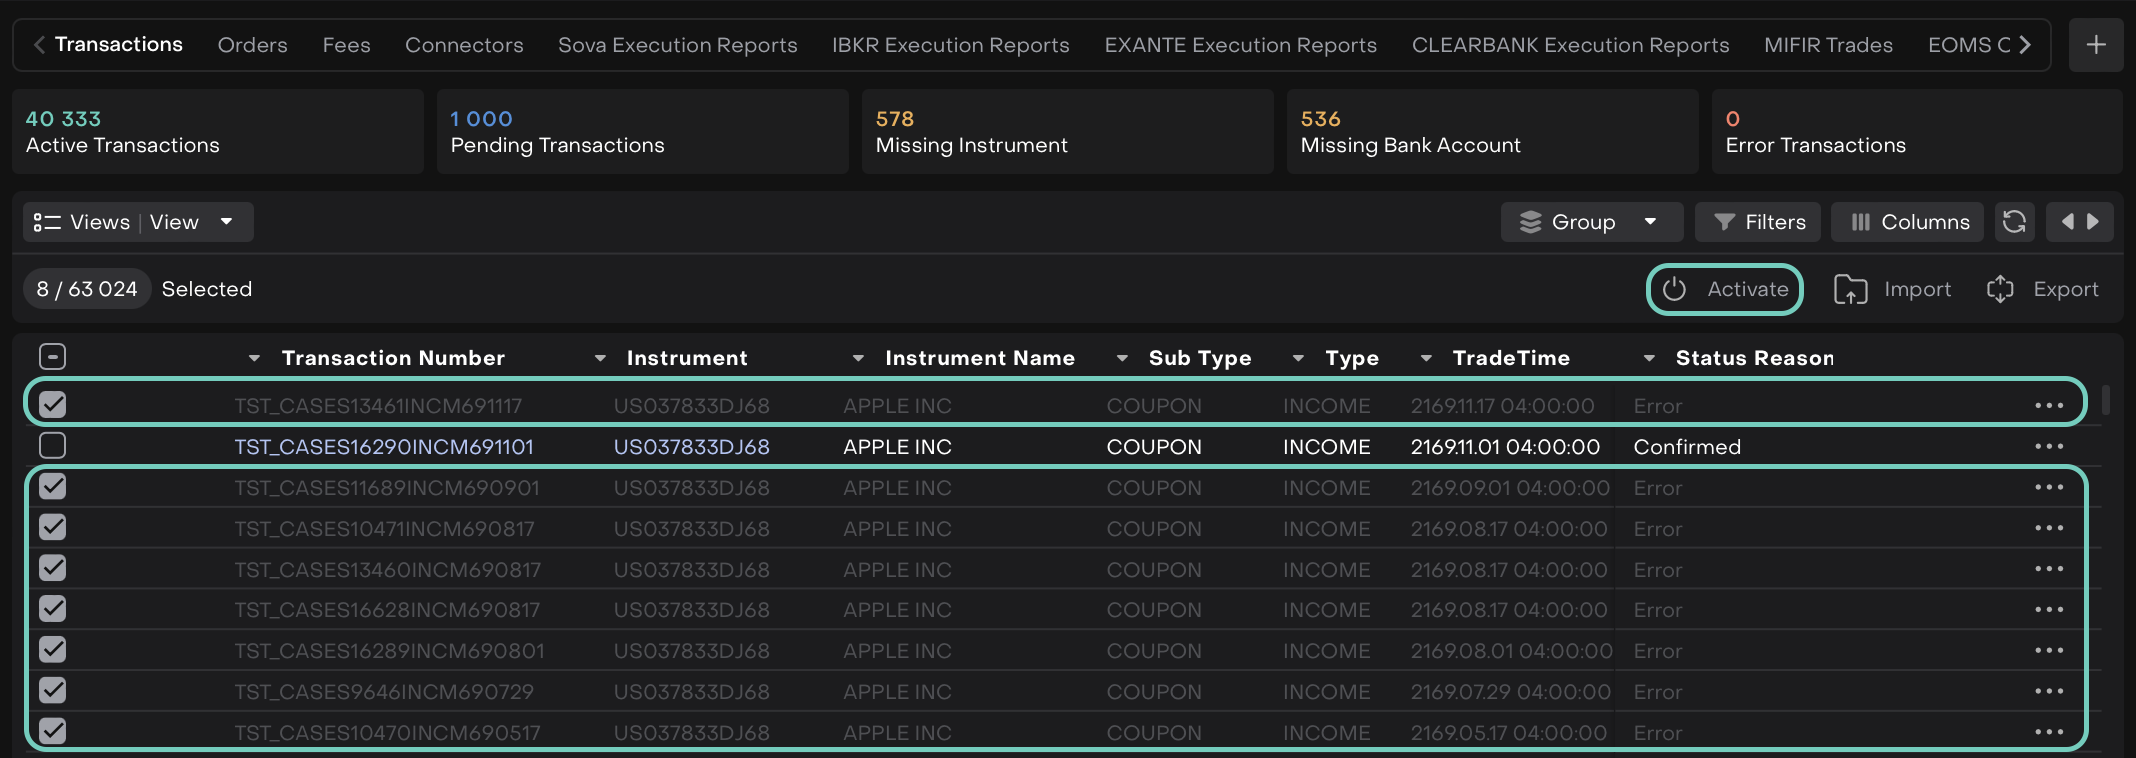
Deactivating Transactions
Deactivation is a way to temporarily or permanently exclude transactions from analytics and processing without deleting them. This is especially useful for correcting errors or cleaning up data.
How to Deactivate Transactions:
Click on the Transactions tab from the main navigation.
Choose transactions using checkboxes or select all.
Click “Deactivate”.
The window opens where the default status reason is
Errorbut you may choose from options likeDuplicate,Missing Instrument, etc.Include a short explanation (required) to describe the deactivation reason.
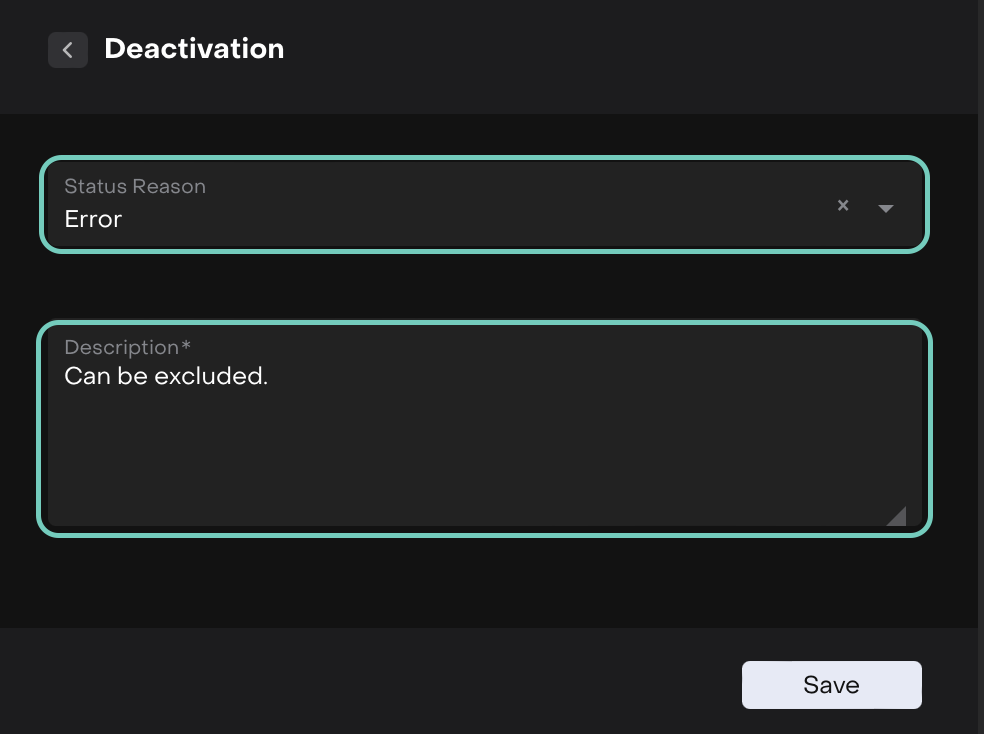
Click “Save” and then the transactions are excluded from calculations and reports.
When to Use Deactivate
To remove incorrect or duplicated transaction entries.
Temporarily exclude transactions awaiting further review.
Cleaning up irrelevant or outdated transactions from older data imports.
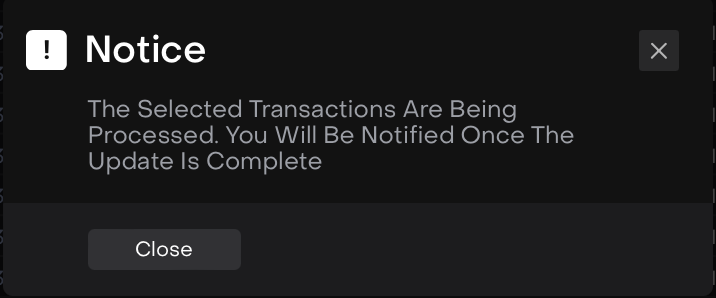
Notifications and Feedback
After performing any bulk action (Activate, Approve, Deactivate), the platform displays a notification: