
Positions Advanced Settings
Introduction
The Portfolio Advanced Settings give you greater control over how your positions are displayed and analyzed. Using these options, you can organize, filter and customize your data view to focus on what matters most to you.
🔗 Click here to learn more on how to view Client Positions.
Use Positions Advanced Settings

1. Group
Use this button to organize your positions into categories. There are two main options:
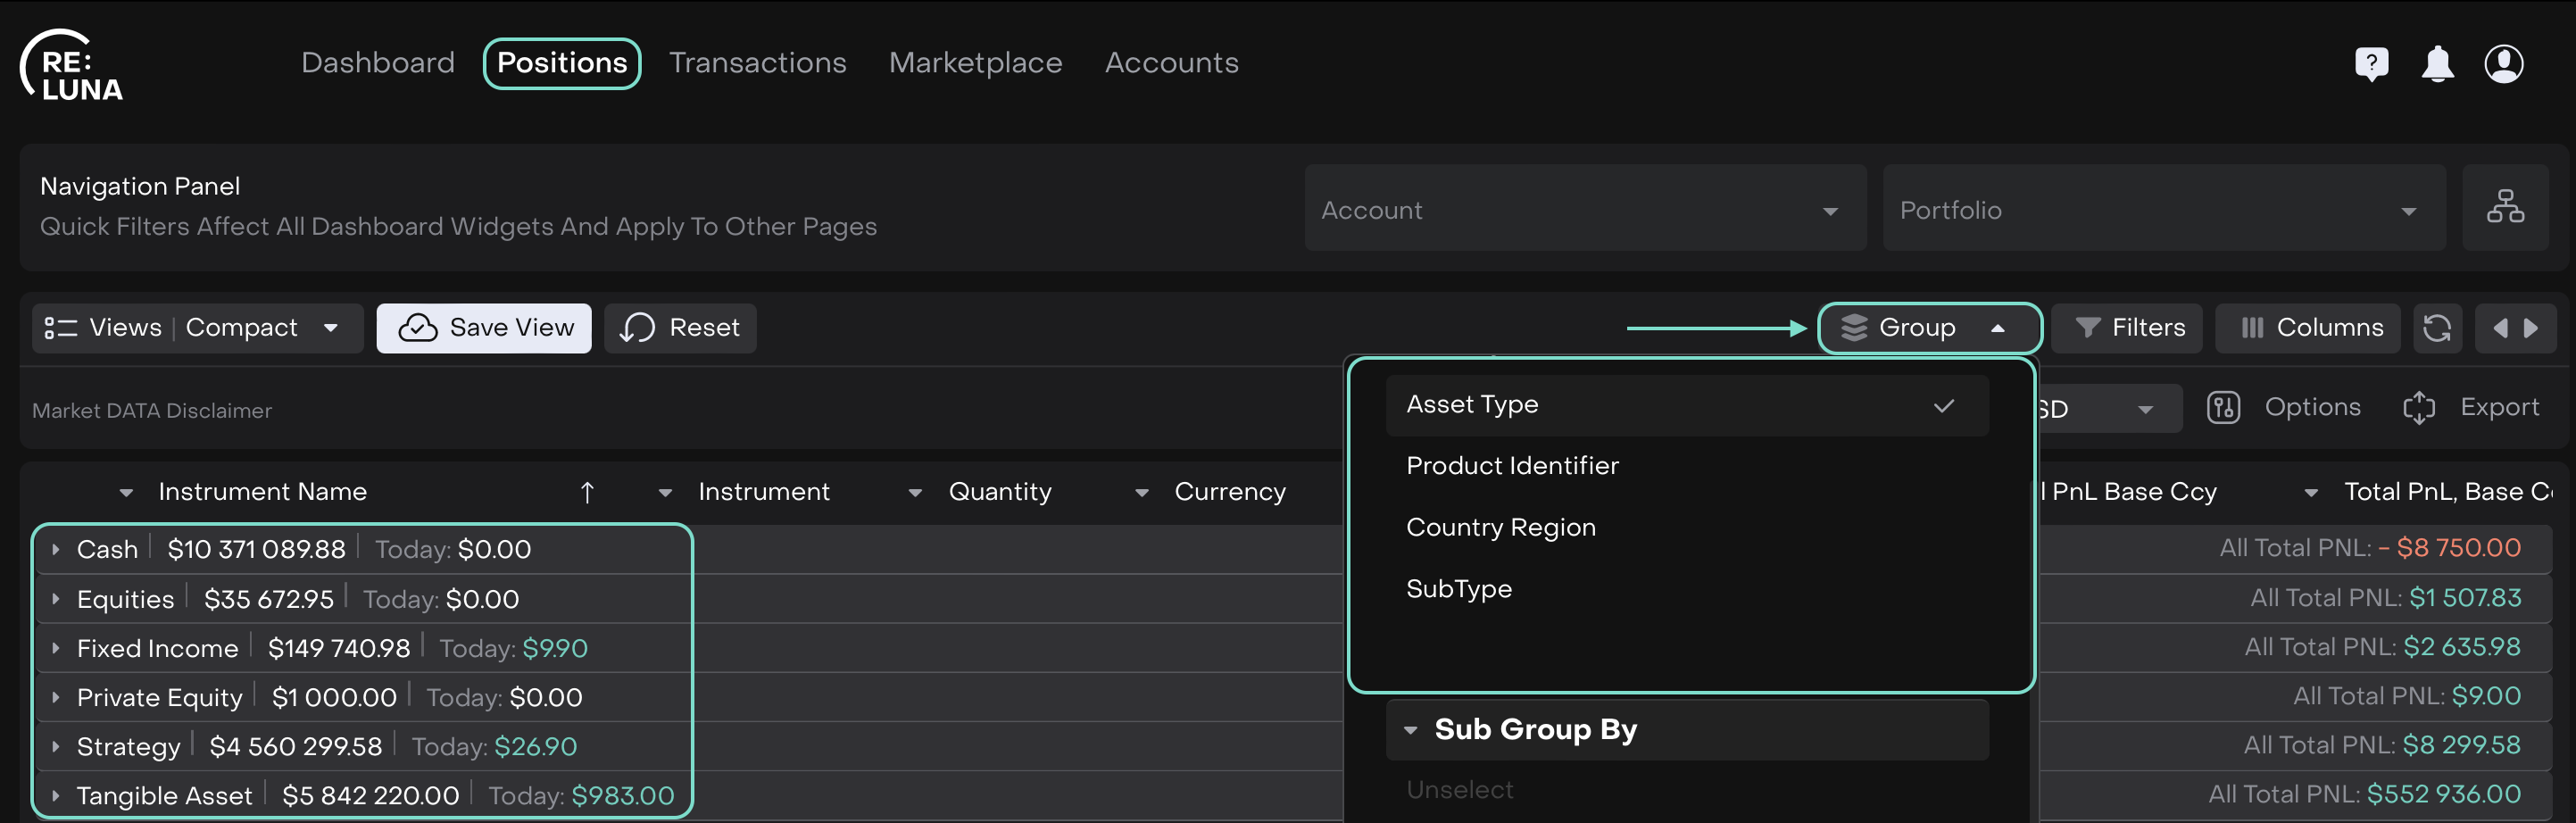
Unselect option unticks any grouping options you previously selected.
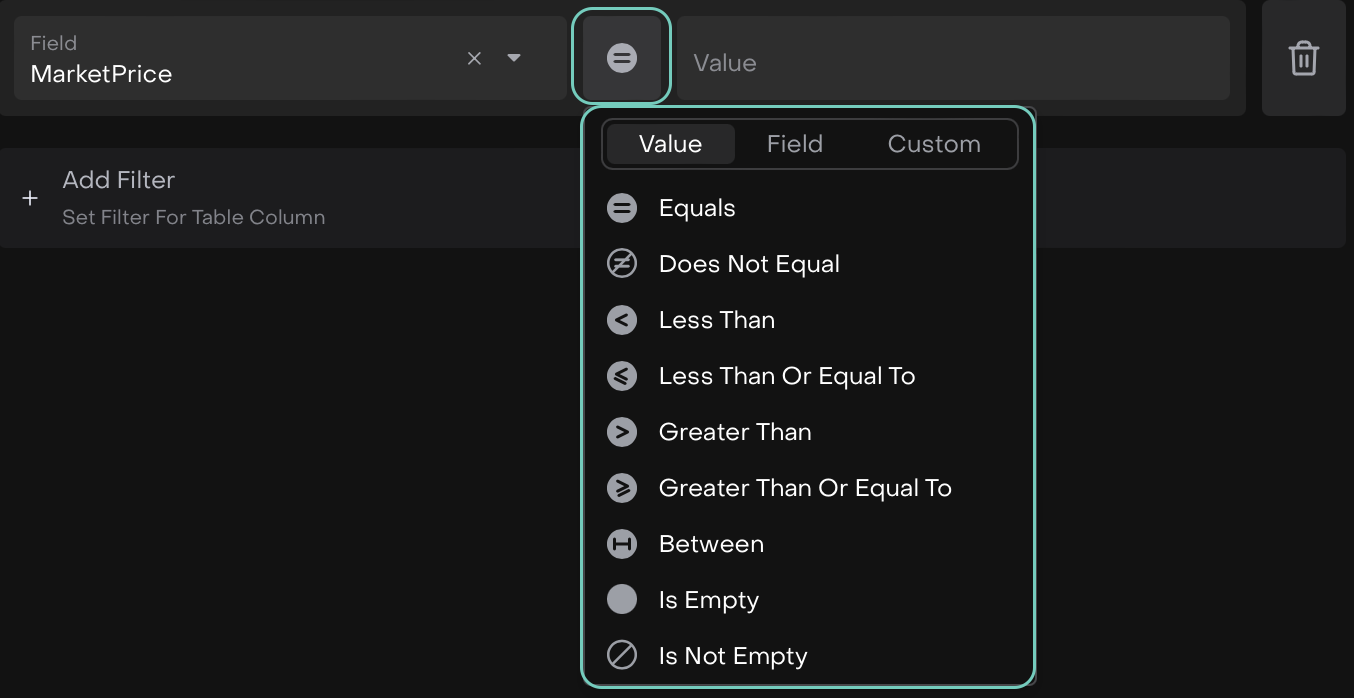
2. Filters
Filters allow you to narrow down your positions based on specific criteria:
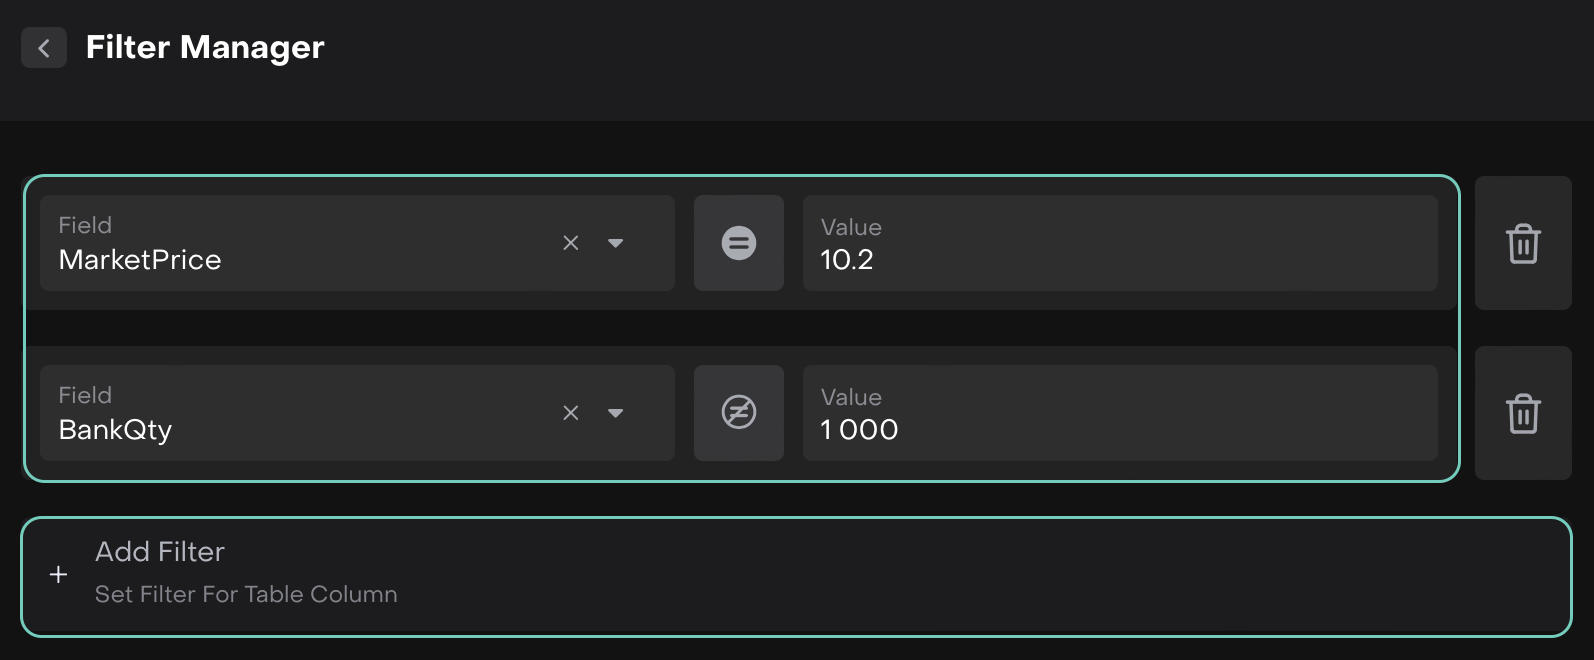
Field Type – select the field you want to filter.
Value – provide the numeric value or select from a dropdown list.
Criteria – choose between Value, Field or Custom.
Once ready, you can:
Apply – filter your positions.
Cancel – remove the filter before applying.
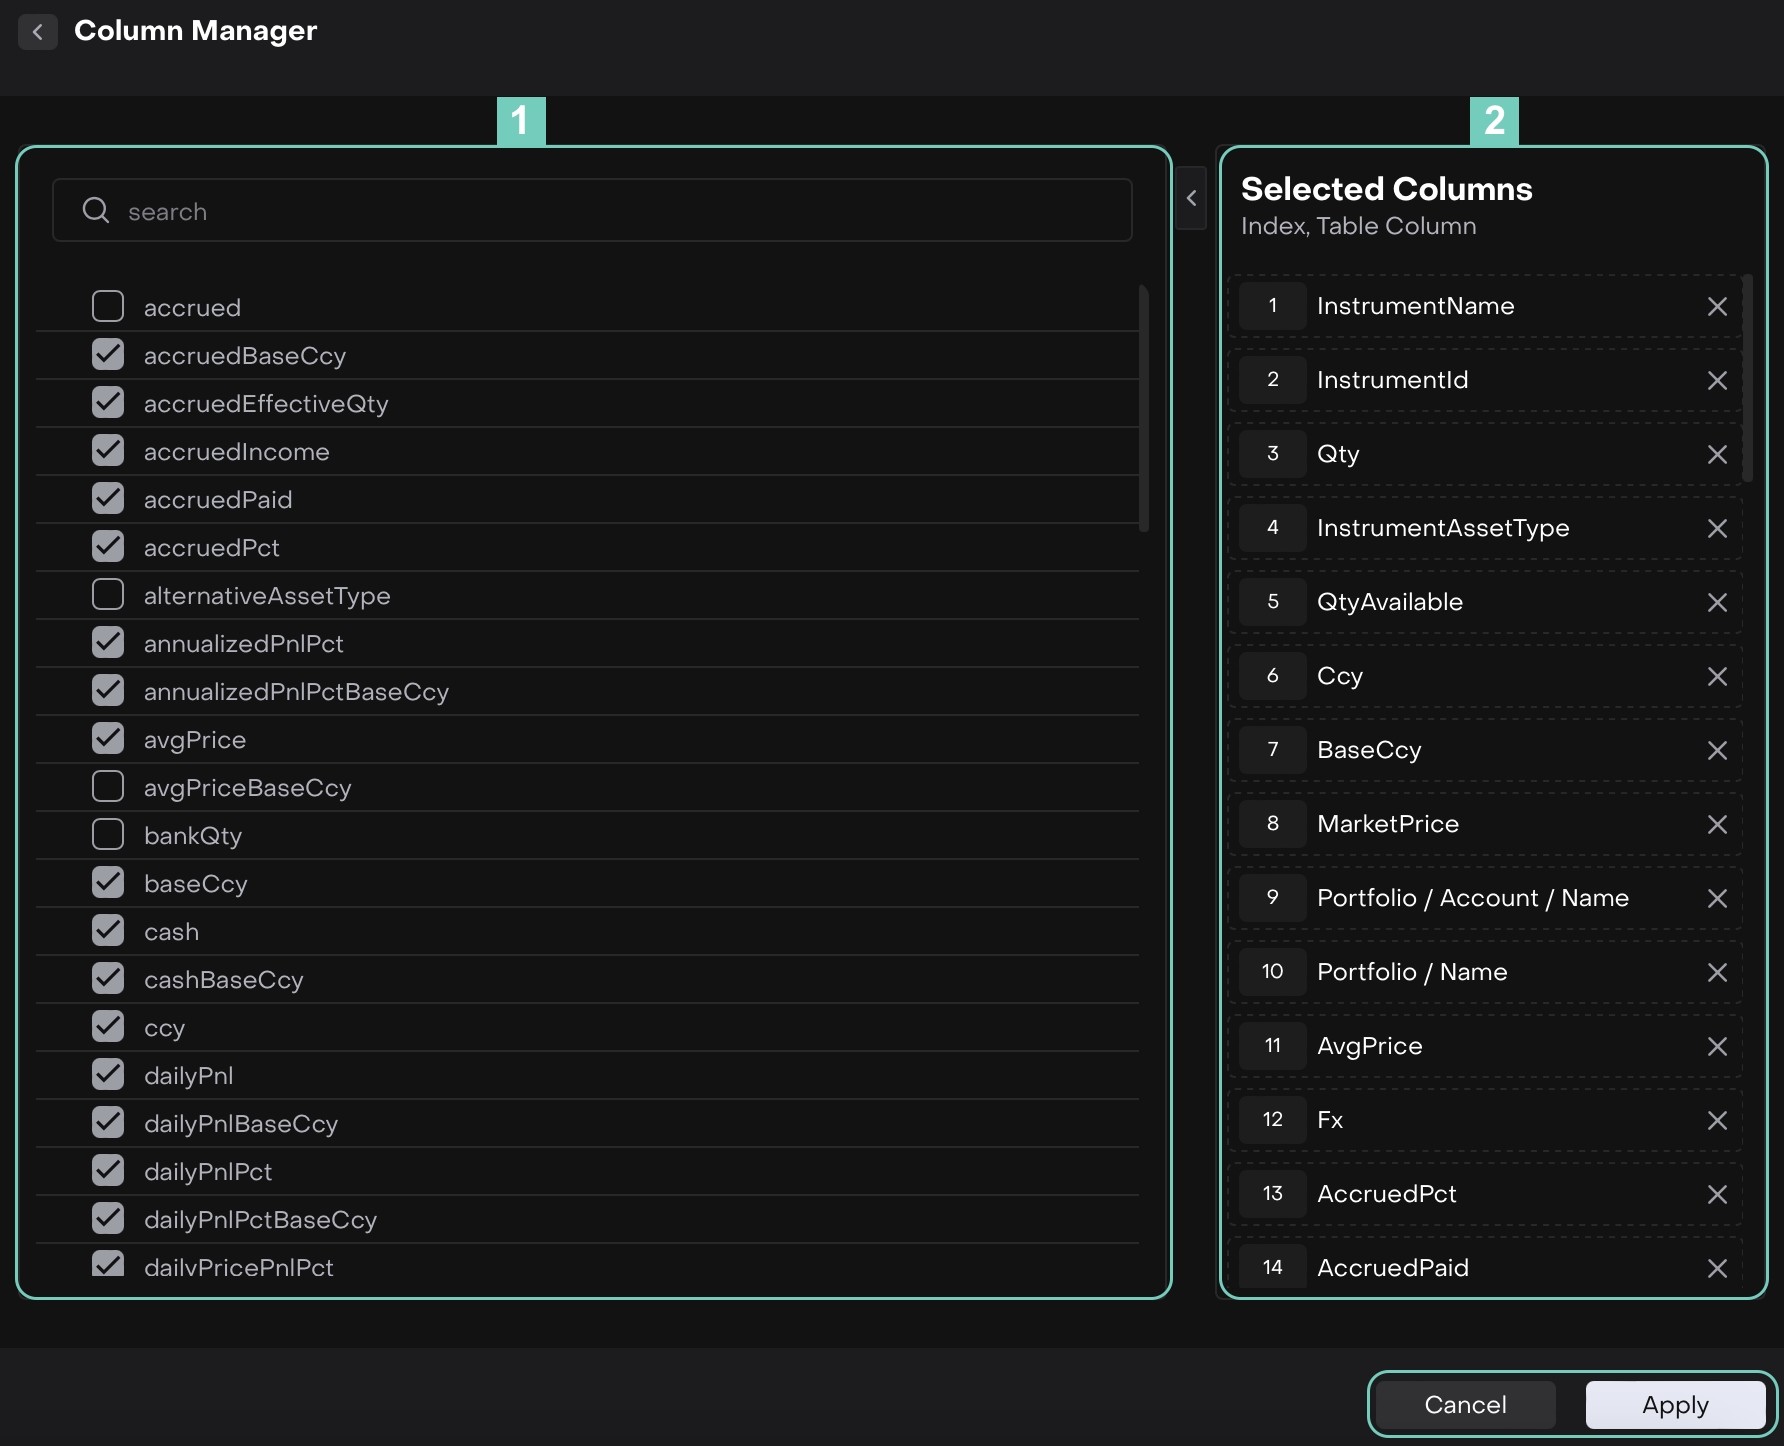
3. Columns
The Columns button lets you manage your table view:
Tick / Untick – choose which fields to appear in your table.
Drag & Sequence – move columns up or down to change the order.
4. Refresh
Click to update the table with the latest data.
5. Expand
Click on it to view the table in full screen or adjust it to a narrower width.
Use Additional Buttons on Positions

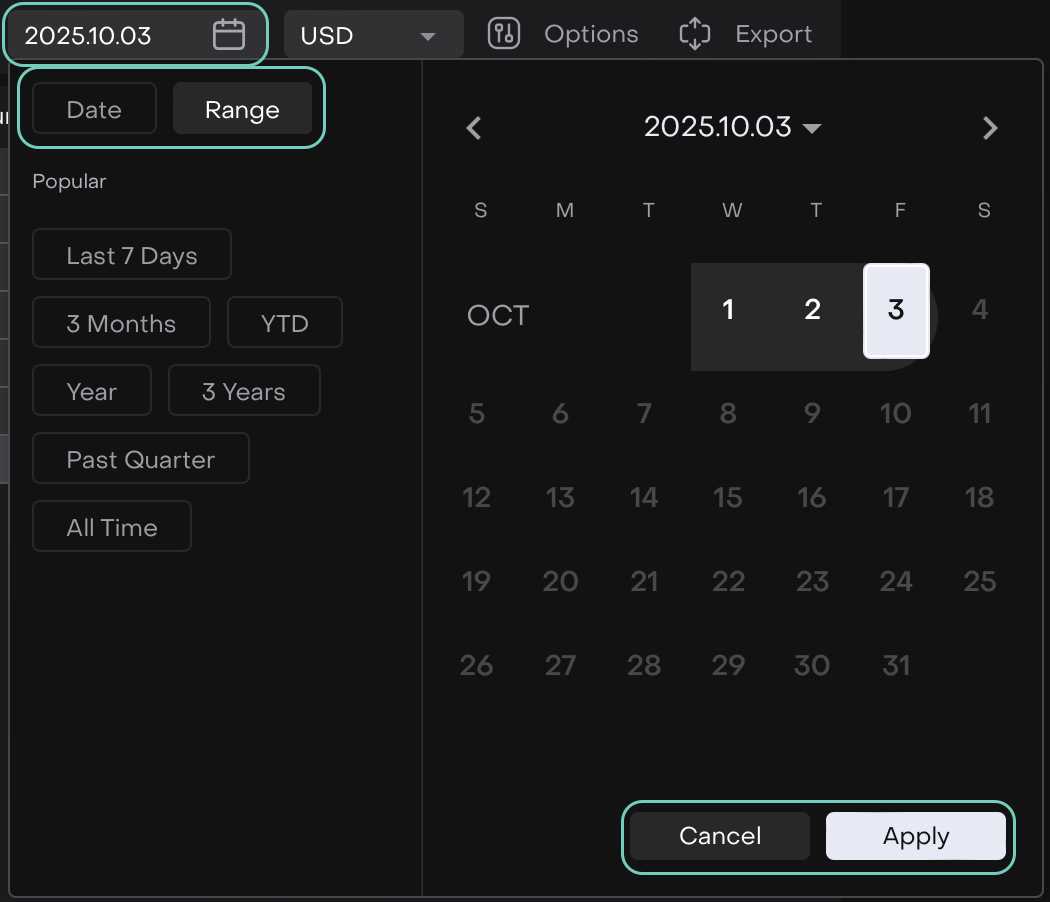
1. Date / Date Range Selector
Choose a specific date or a range to display positions for that timeframe.
2. Currencies
View positions in different currencies: USD, EUR, RUB, GBP, CHF.
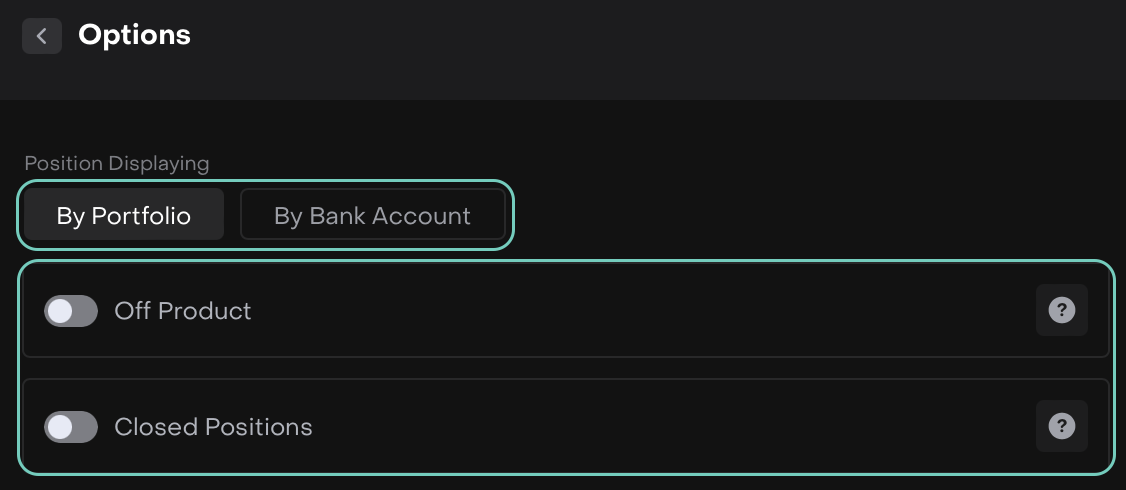
3. Position Display Options
By Portfolio – view positions grouped by portfolio.
By Bank Account – view positions grouped by bank account.
4. Export
Export all table data to Excel.
The exported file will include all the columns currently displayed in your table.