Create Instruments Manually
Introduction
A platform feature that allows you to add financial instruments when they cannot be automatically fetched from market data sources. This ensures uninterrupted trading and record-keeping for your portfolio.
⚡ Quick Facts:
⏱ Time to Complete: 5-10 minutes
📊 Asset Types: 12 types supported
✓ Process: 7 simple steps
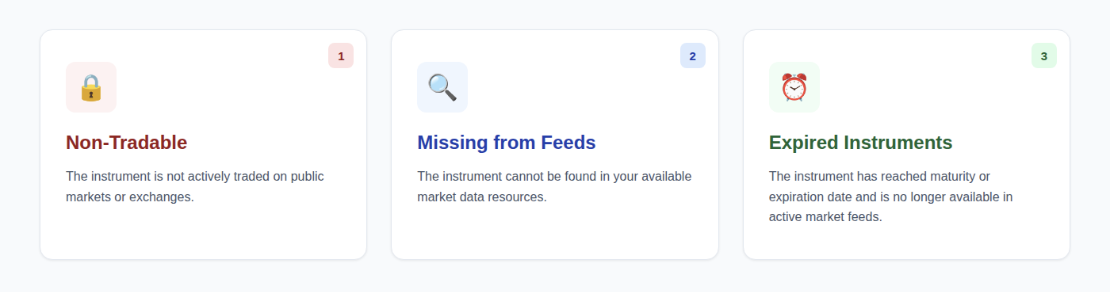
When to Use Manual Creation
Use manual instrument creation in these specific situations:
Corporate actions are not supported for Private instruments
Supported Asset Types and Subtypes
The following Asset Types and Subtypes can be created manually on the platform.
👉 Need help finding an instrument before creating it manually? Check out the Unified Instrument Search Guide to learn how to search using Internal, External and By Ticker options.
3-Minute Setup
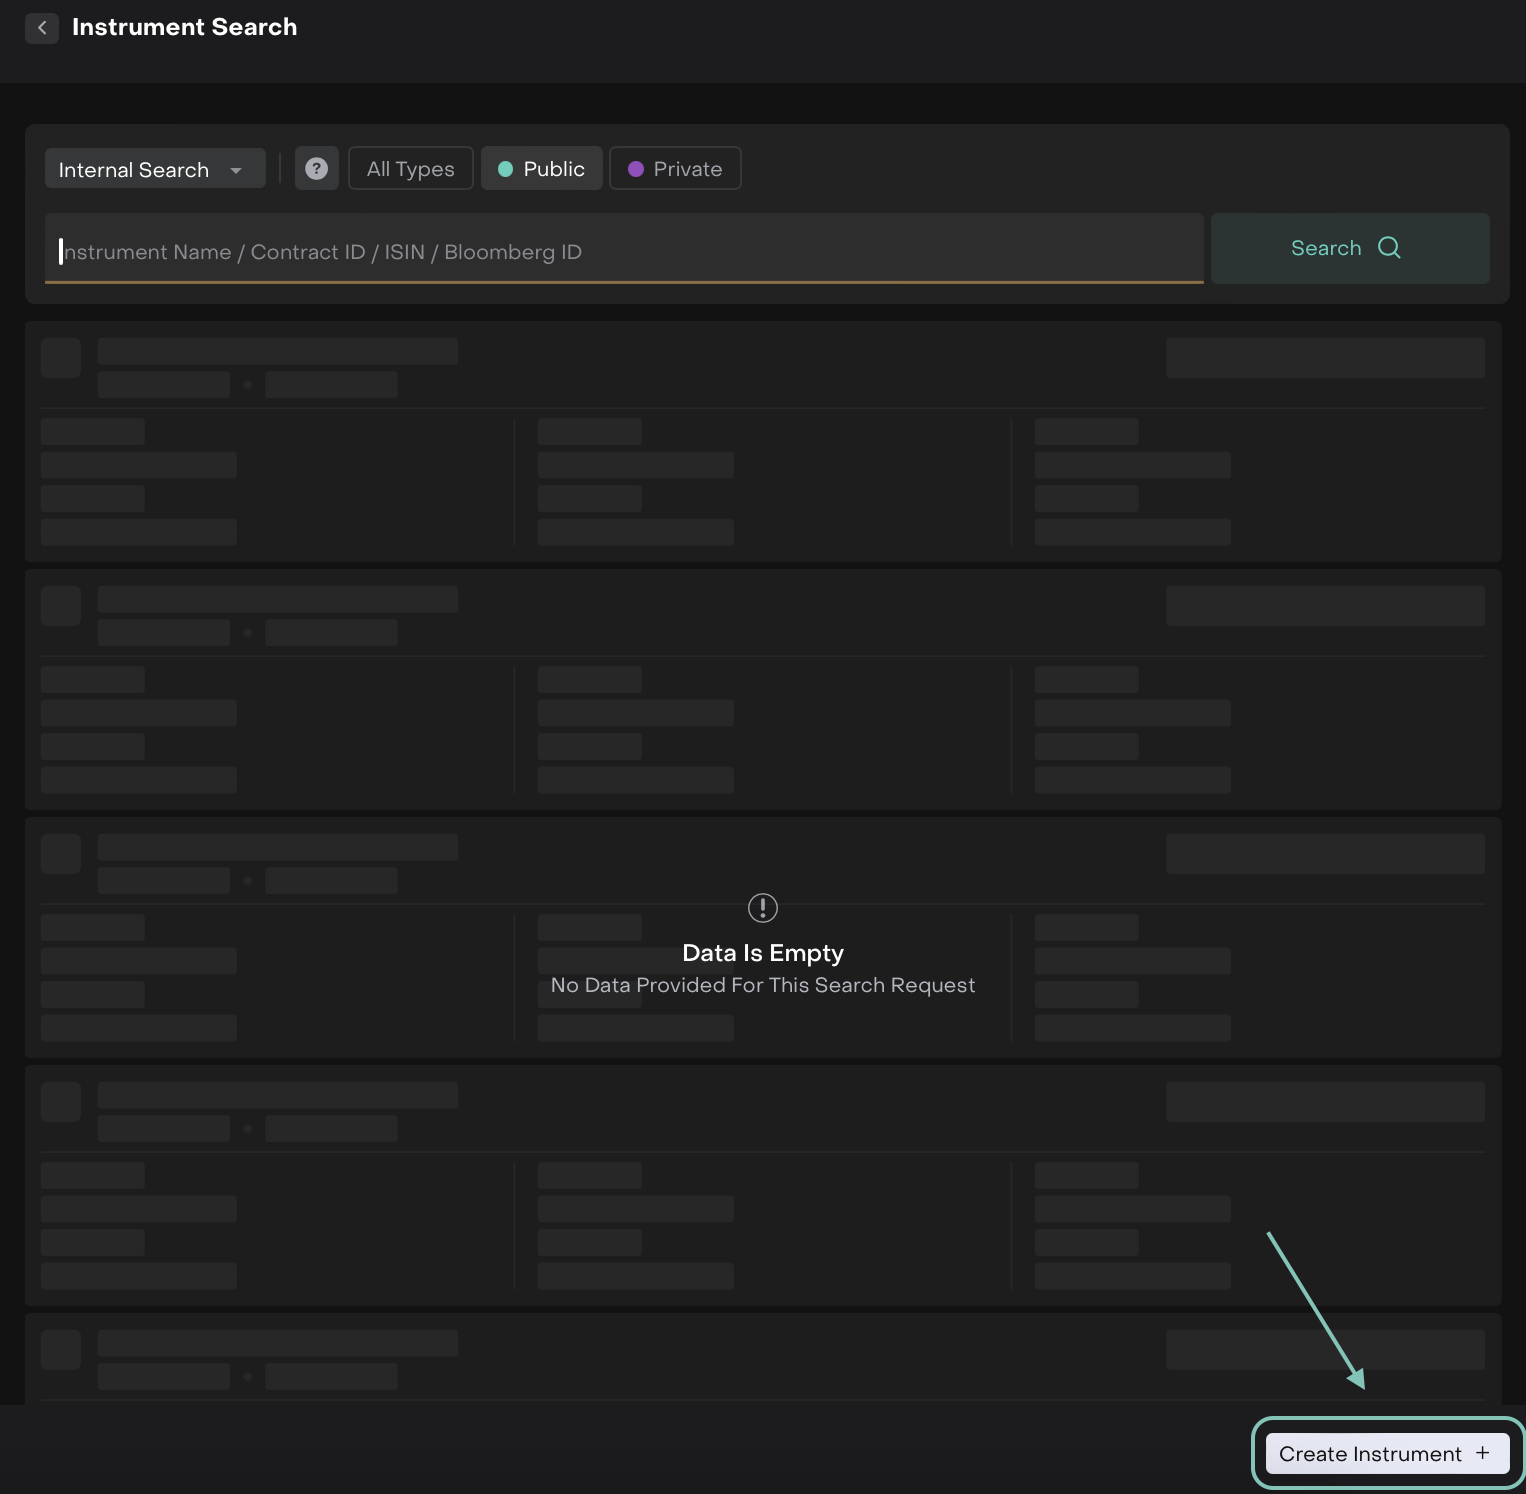
STEP 1: Search First
Go to Transactions > Find Orders/Transactions tab
Search Internal, External or By Ticker

If not found > Proceed to Step 2
STEP 2: Initiate Creation
Open Orders/Transactions form
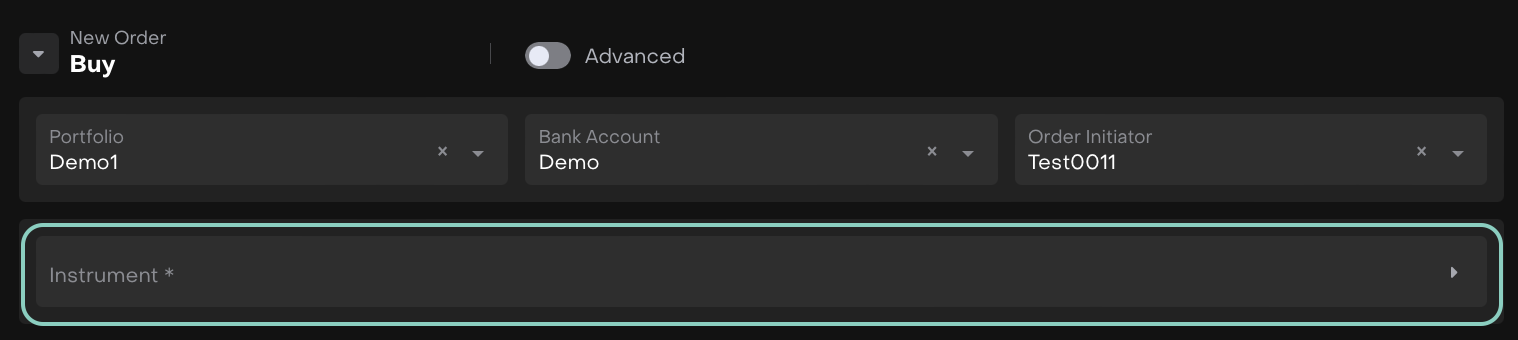
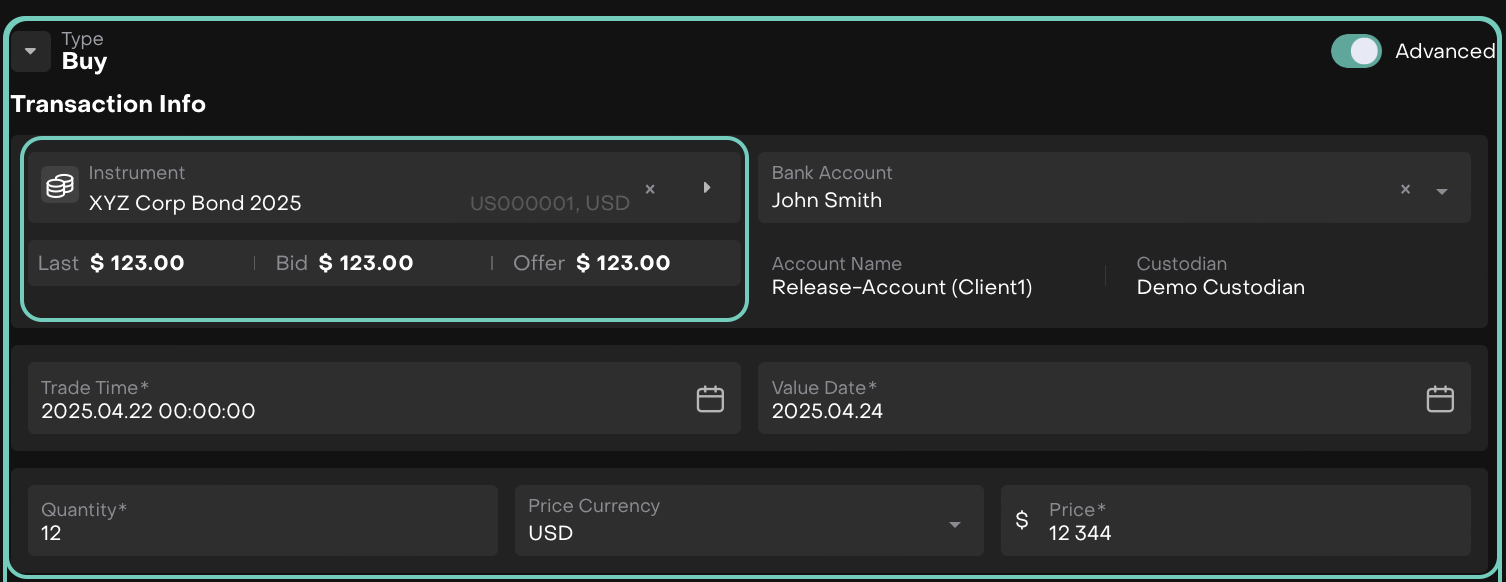
Orders Form
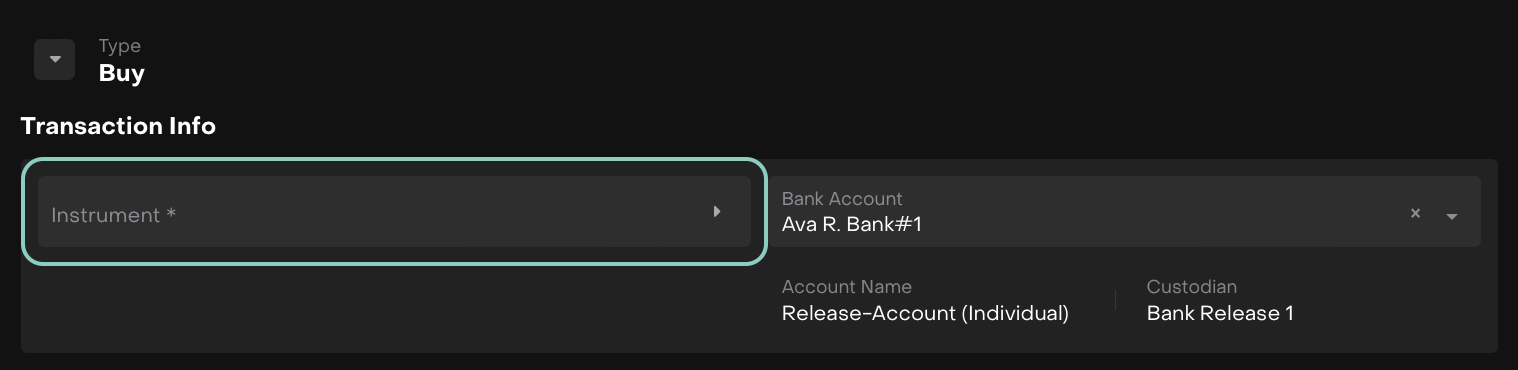
Transactions Form
Click Create Instrument +
👉 Need context on Public vs Private Instruments? Click here to learn how the platform retrieves instruments during all search types.
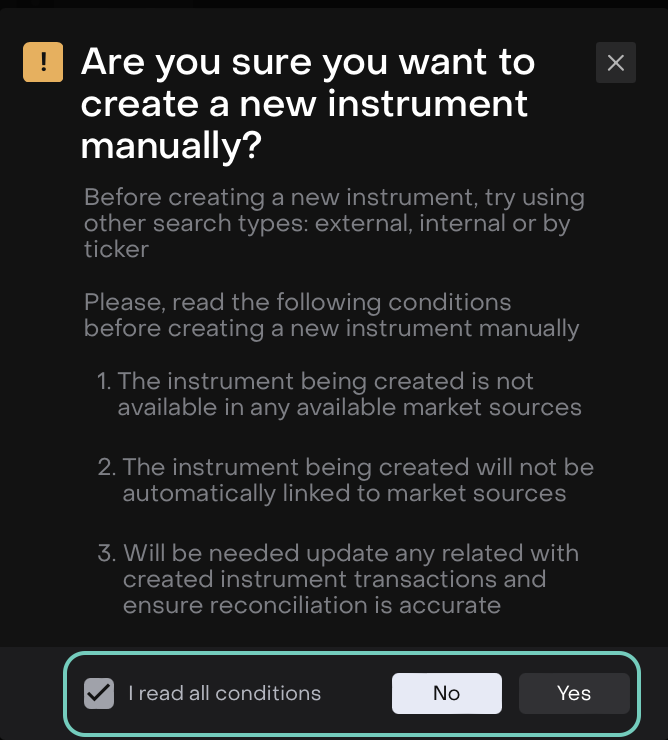
Check the box for “I read all conditions”, then click Yes to proceed.
STEP 3: Select Type & Subtype
Choose Asset Type (e.g., Fixed Income, Equities, ETF)
Public instruments cannot be duplicated as Private.
Select Subtype (e.g., Bond, Equity, Mutual Fund)
When you select an Asset Type and its relevant Subtype, the platform automatically suggests the relevant fields required for that combination.
Click Next

Loan/Granted Loan/Deposit instruments can only be created from the Transaction form, not from the Order form.
FX and Cash types are not available.
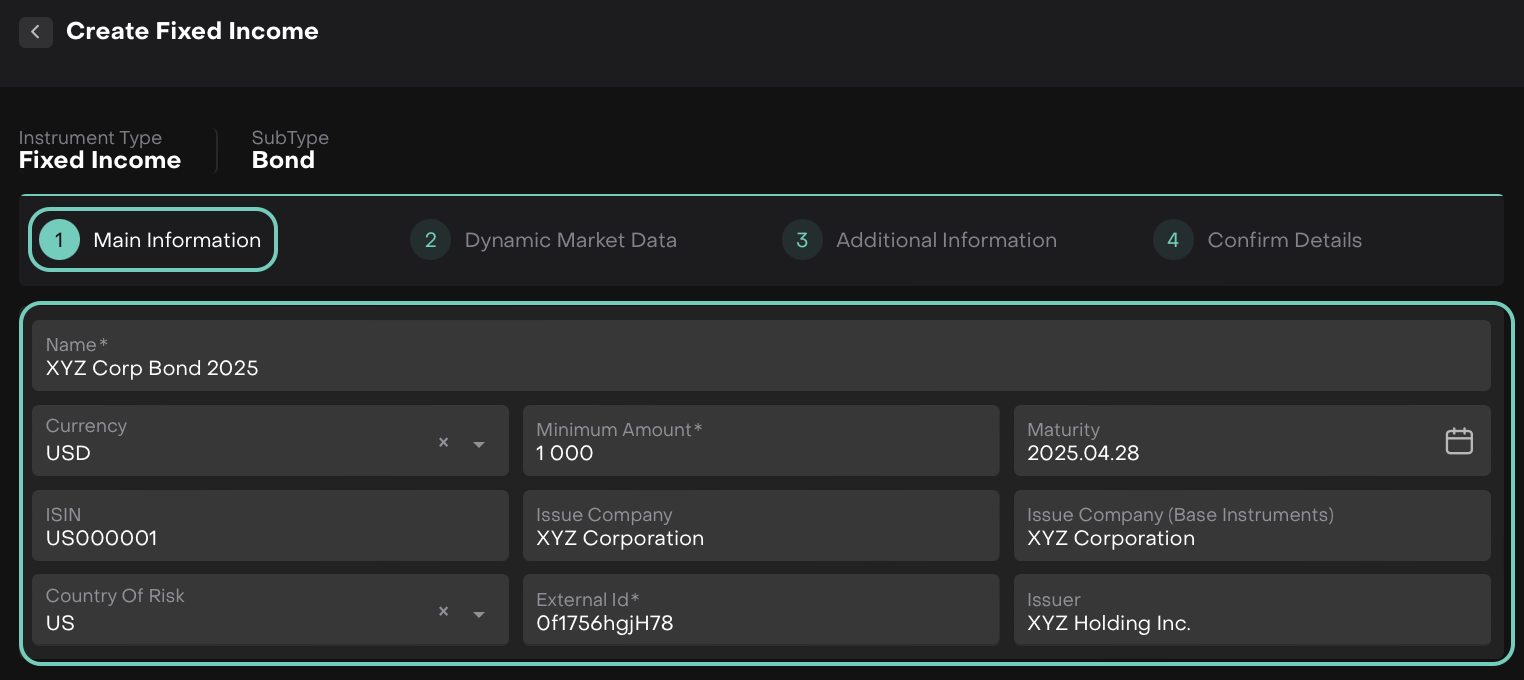
Use Case Example: Creating a Fixed Income Bond
STEP 4: Fill Main Information
Here, fill in the required fields such as:
STEP 5: Add Market Data
Option 1: Import Template
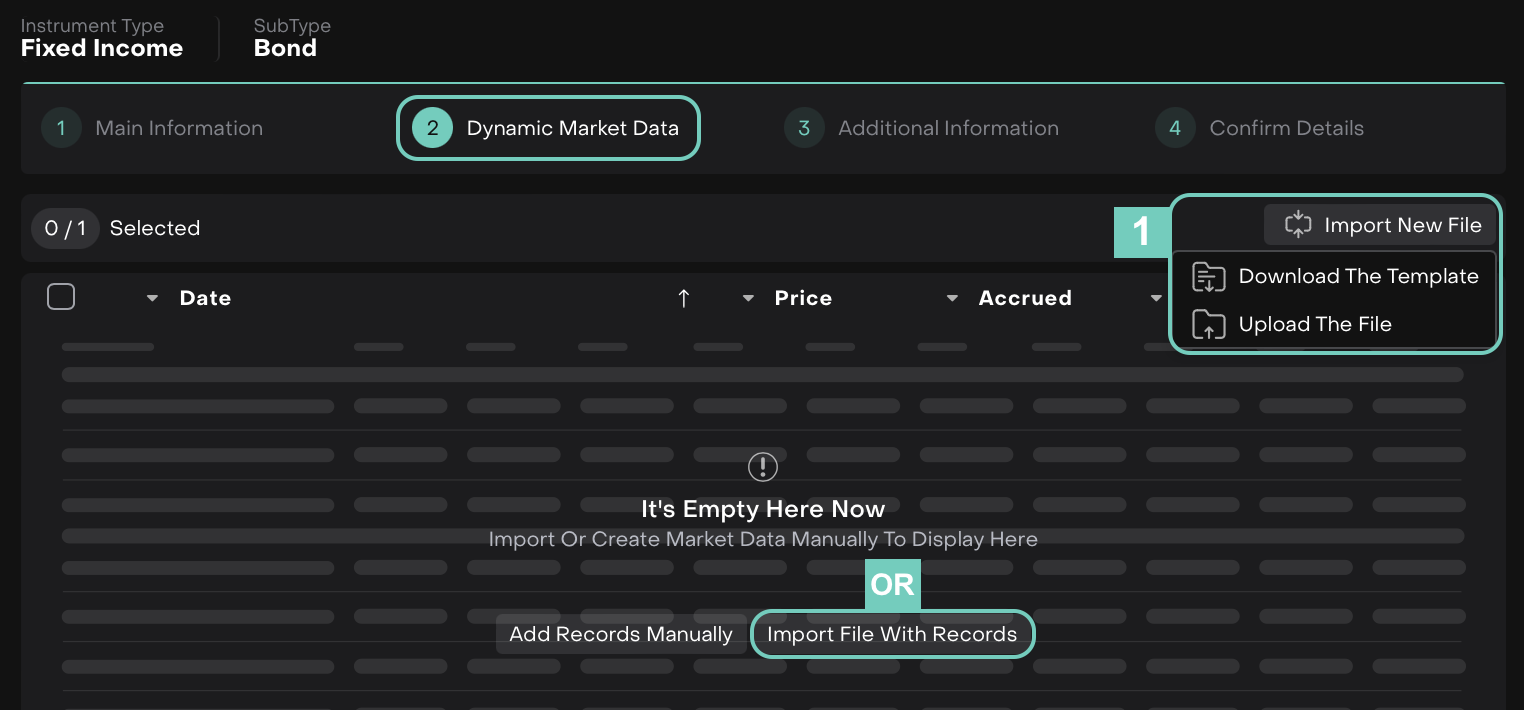
Click Import New File > Download Template
Or,
Fill Template > Upload File with Records
Option 2: Manual Entry
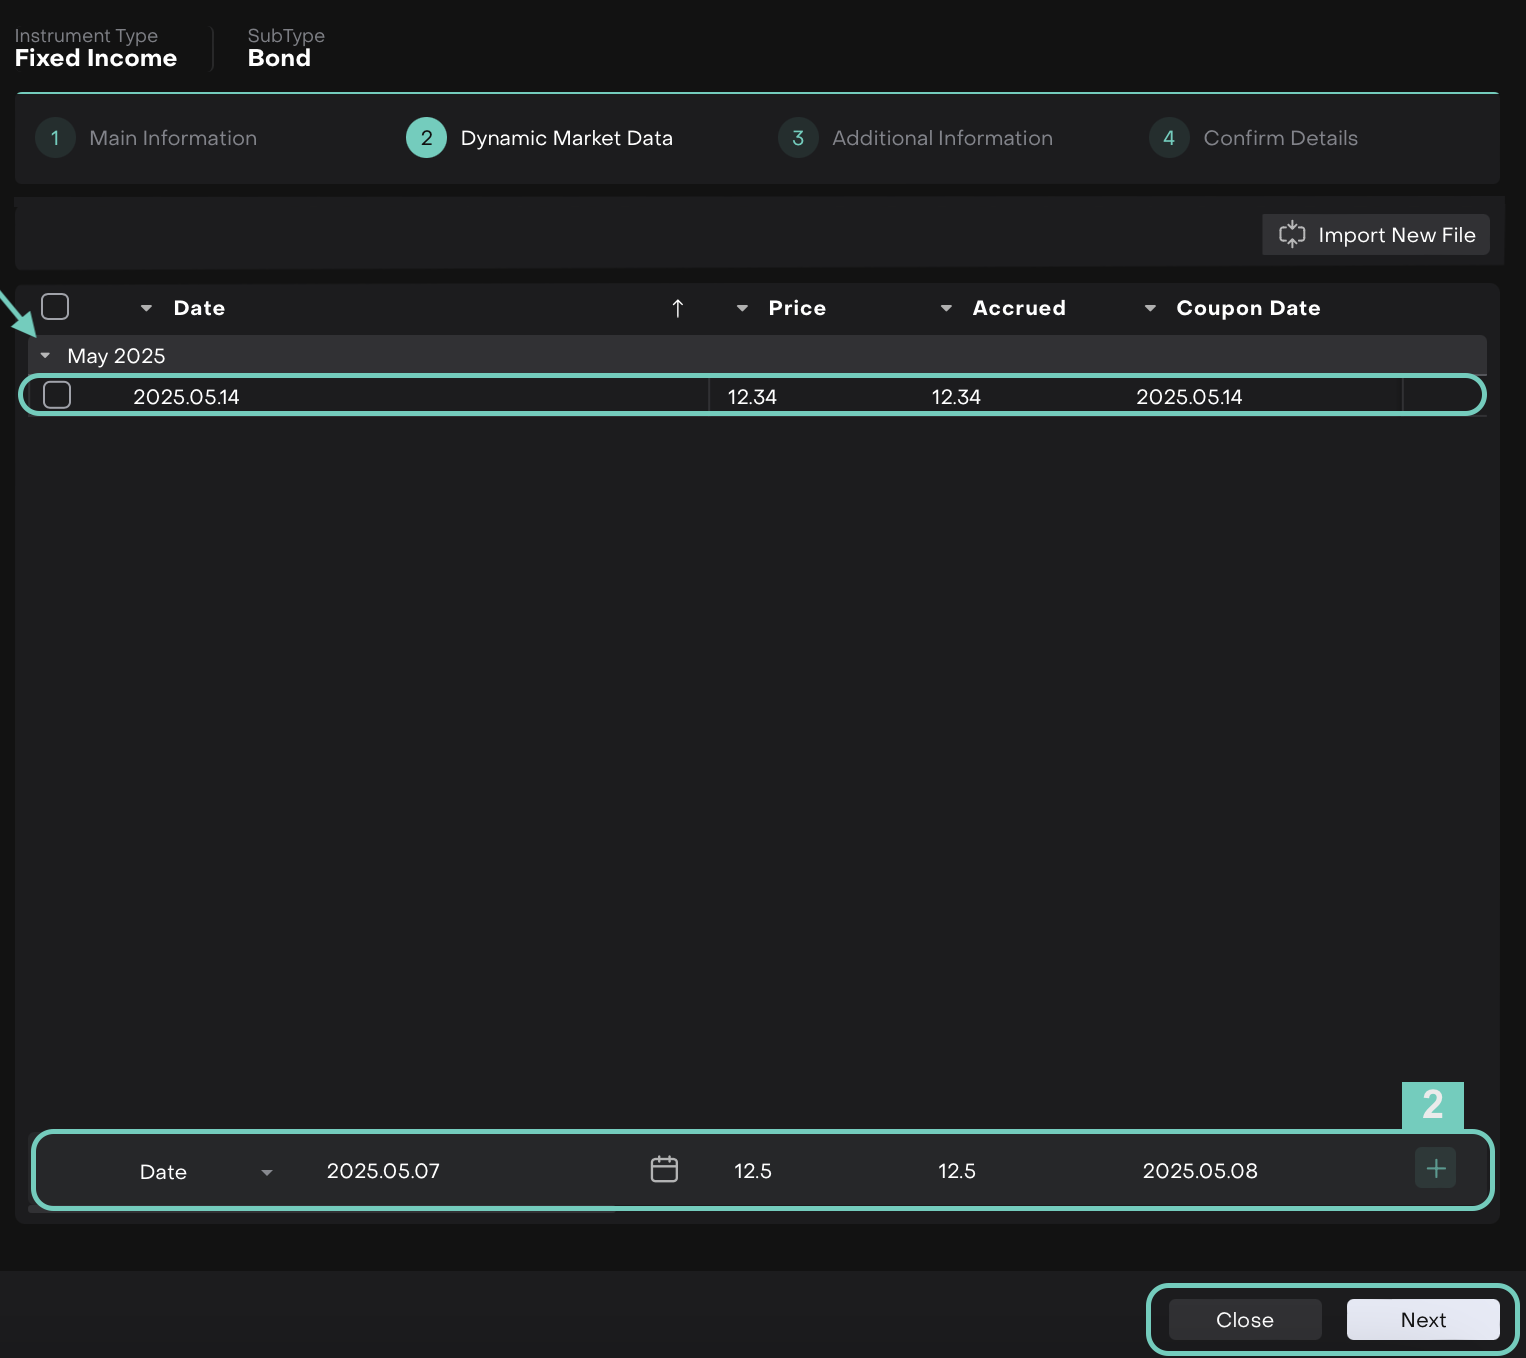
Scroll horizontally to view and complete all columns.
Fill fields (Date, Price, Accrued, etc.)
Click Next or Close.
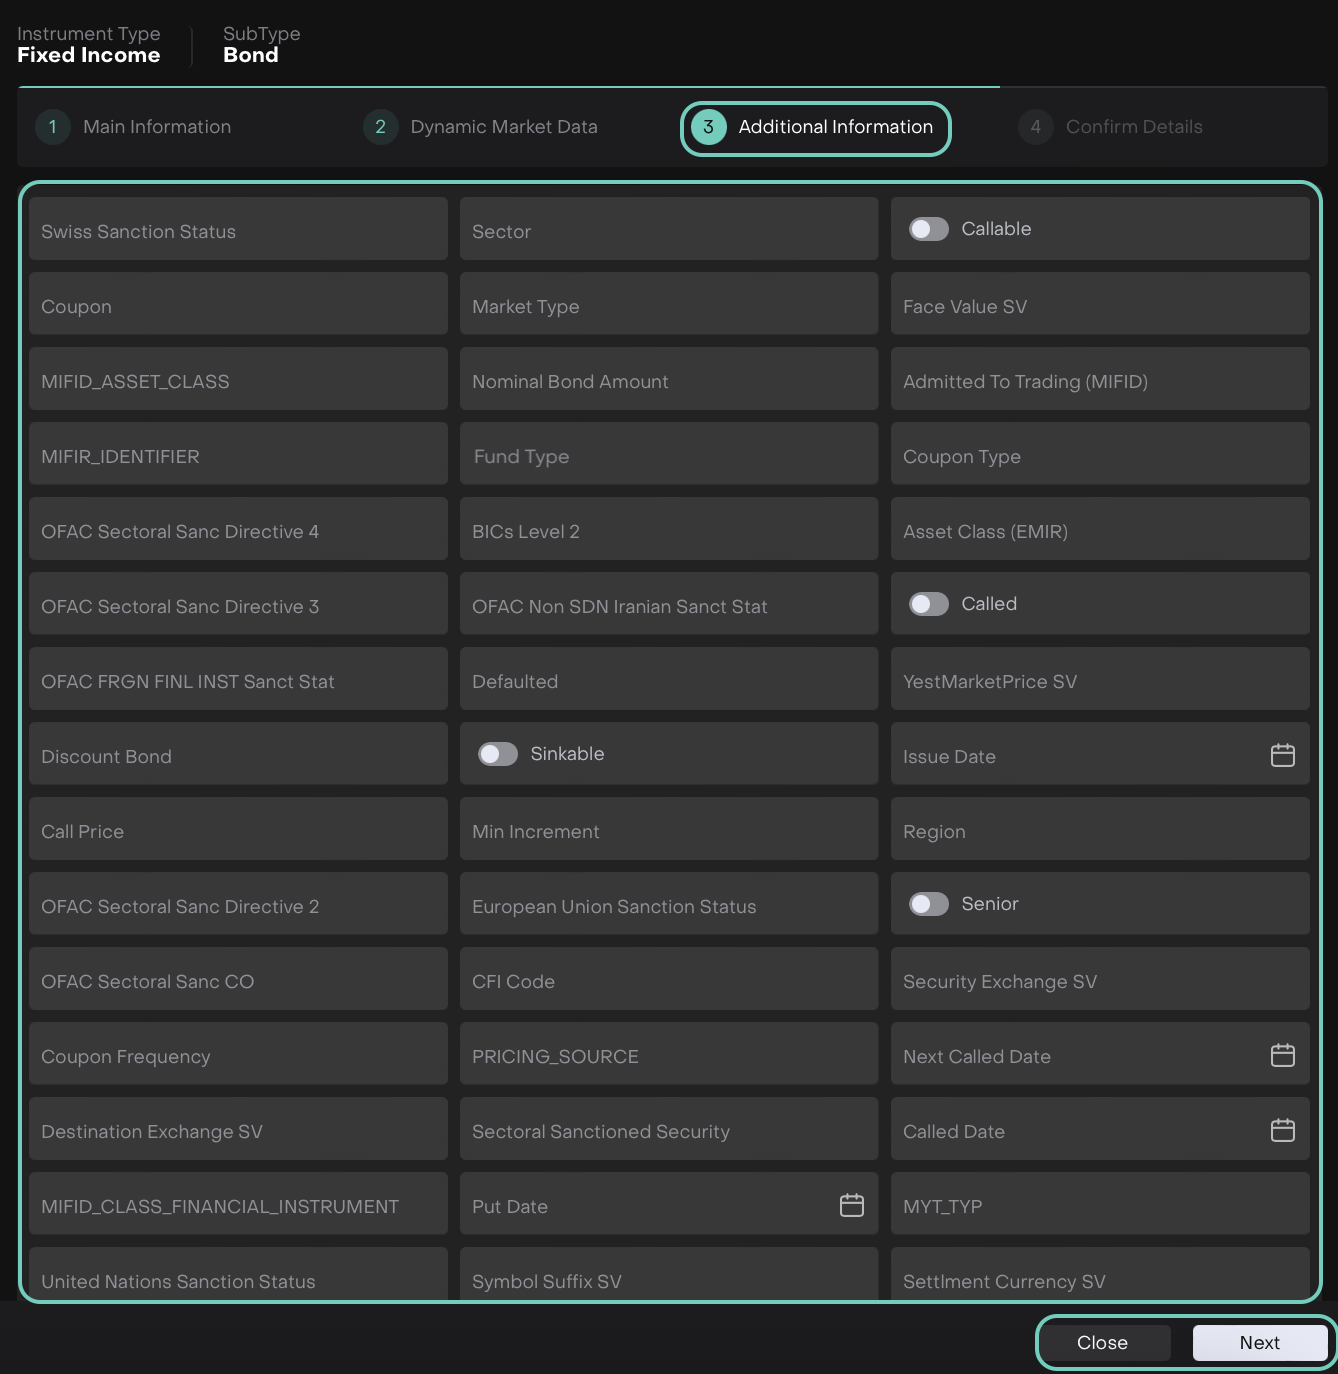
STEP 6: Review & Create
Fill Additional Information (if required)
Review all entered information
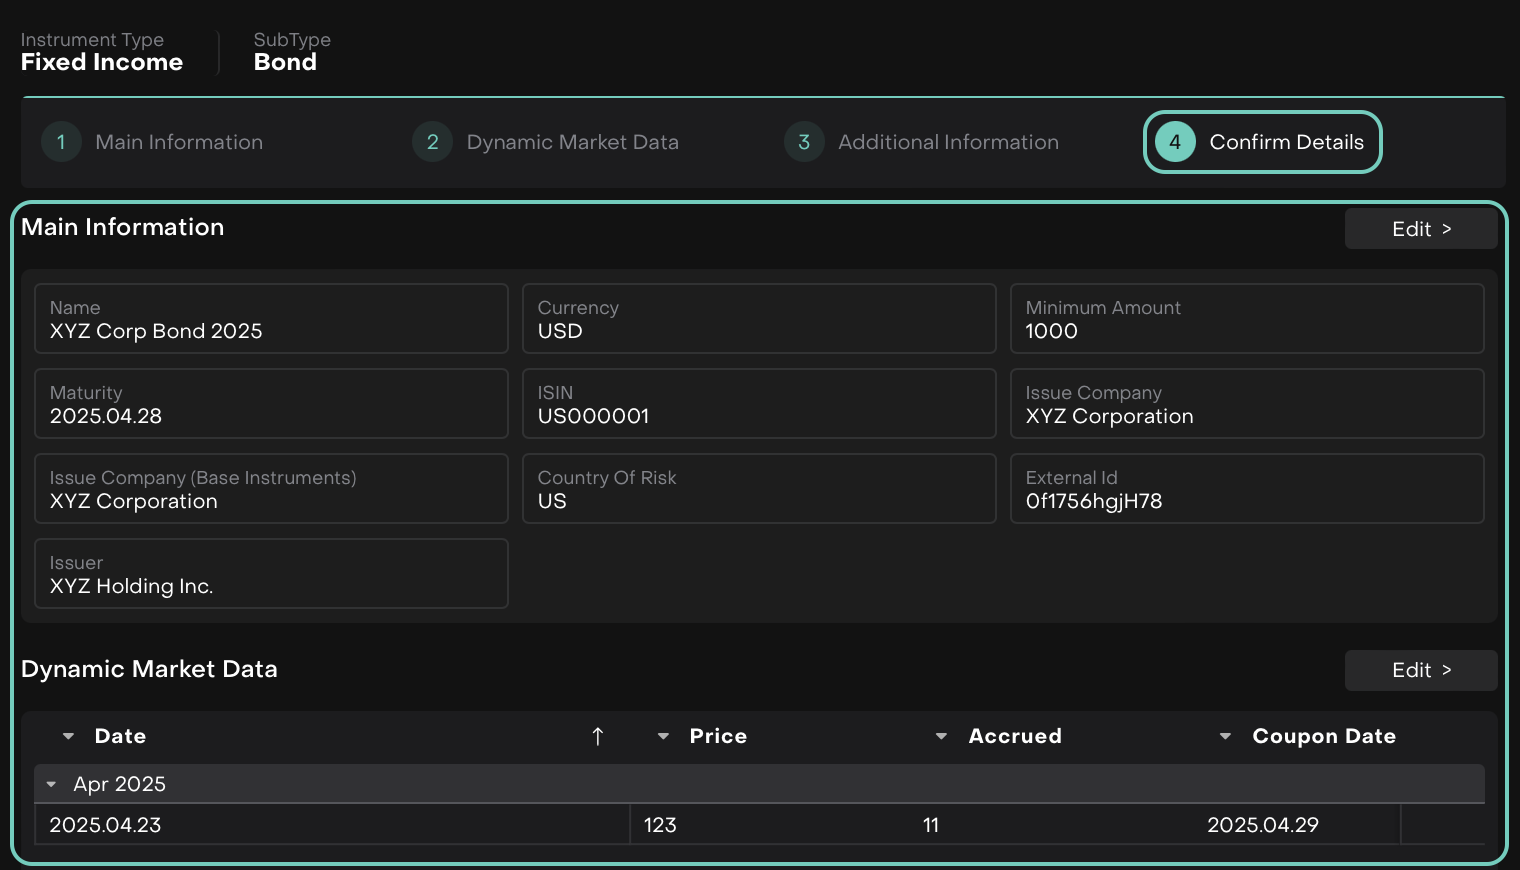
Click Create to complete the process

✅ Success message appears.
STEP 7: Check Newly Created Instrument
Instantly available in Orders/Transactions form
Name, ISIN, key details, and price auto-filled
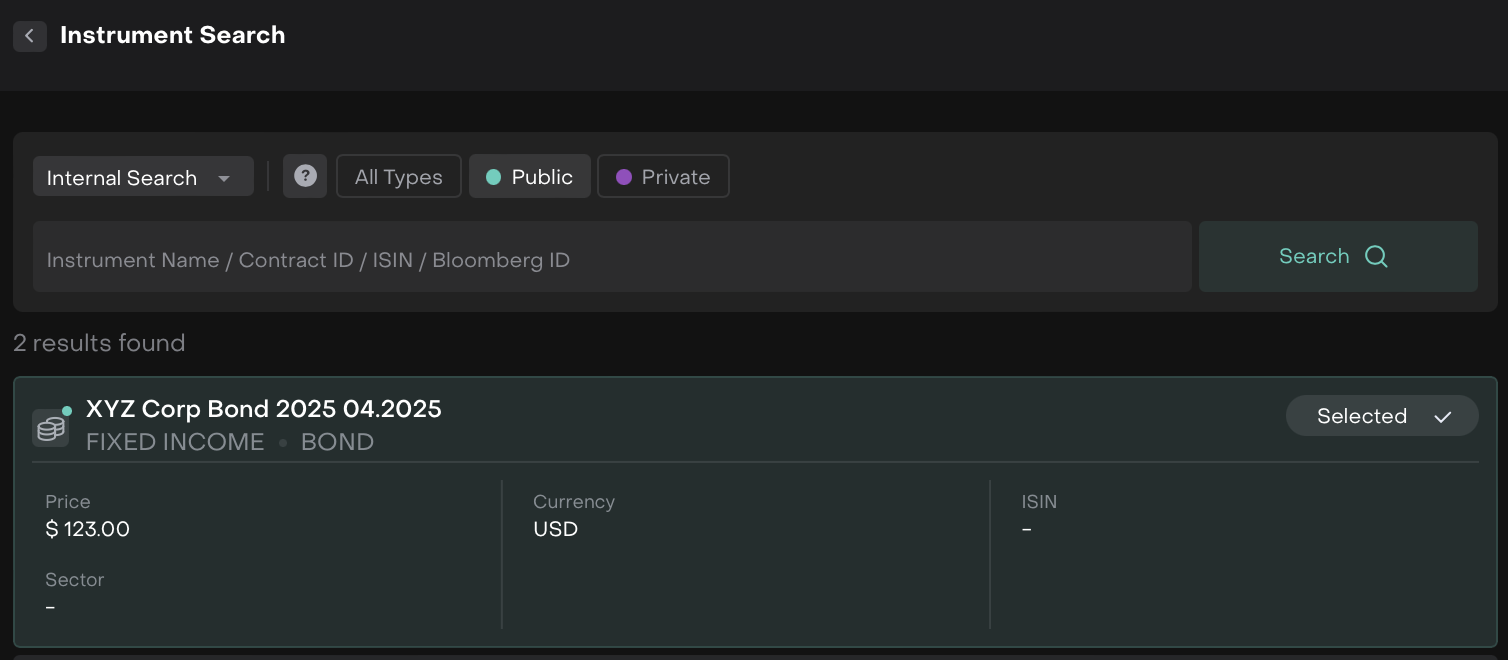
Treated as a Private Instrument (visible only within your organization/environment)
Review details and continue to submit the form.